Tuesday, August 23, 2022

49 and Market ArtOptions Alena

 Hello Lovelies! I am bringing you a layout created with the brand new gorgeous ARToptions Alena. I get water color tropical vibes with this collection.  Keep your eye on 49 and Market, because the collections and accessories  that are coming out are going to blow your mind!  With Alena, the boldness of the reds and Blues go so well together! I just had to highlight the reds with the gorgeous flowers in Tomato with a  touch of Bluejay. 


I used the Curators Essential Key Lined Frames for my photo. There is a throwaway piece in-between the frames, and I chose to keep it and cover it with Alena Fabric Tape. Its like Washi Tape on a role but stronger!! Because it is fabric! I just set in the fabric covered piece in between the frame and the photo. I used 3 different frames as my centerpiece to highlight the photo. I added the sweet little chipboard hearts, and popped up 2 laser cut postage stamps. 


I created a little cluster off to the right side of the layout. I took one of the Curators Essential Key Lined Frame and just worked my embellishments around it. I used jute to string on the chipboard and paper tags. I added laser cuts and flowers to finish the cluster. I used 2 laser cut butterflies and adhered  them on the page by their bodies only, then fluffed up their wings for dimension. 


This is just another closeup of the lower corner of the layout. I machine sewed all around the paper using a coordinating blue thread. I added the laser cut word You. I removed the string from the Alena Tag, and replaced it with jute, to match the chipboard tag. I used some red and blue distress ink watered down, and spattered it on the layout. I also added a few rhinestones here and there for added sparkle. 


I hope you are inspired to use Alena in your future projects. There is so much to this collection and all of the coordinating accessories. Be sure to check them all out. You will want it all!! xo

49 and Market Products used 

49 and Market Products Used:

Saturday, August 20, 2022

Scrap and Me Guest Designer "Sapphire Days" paper collection

  Hello! I am back as a Guest Designer for August. Today I am bringing you a 12x12 layout created with the gorgeous Sapphire Days paper collection. The collection is full of beautiful blue and cream flowers, with a touch of pale yellow. The color combination is simply so soothing to the eye. I felt it was perfect to scrap pictures of my granddaughter when she was only months old.  For my design, I decied to do a horizonal design, so i applied some texture paste using a mask, and sprinkled some embossing powder in a color blue that complimented the paper. I heat embossed it to give it shine, and then began building my design over it. 

I used the paper on the inside of the cover page to the collection for all of the elements. I used different punches to create the base to the design. I die cut film frames, and 2 kings of torn notebook paper. I fussy cut the door from the Doors and Windows cut out sheet. And I die cut the circles from the inside of the cover page. I scattered some cut out butterflies on the page. The title "With Love" was also cut from the inside cover page. 


I fussy cut the entire page of Sapphire days Flowers. It makes it easy to just pick what you want to tuck in the page. It is like picking flowers in a garden! I added layers of different flowers and leaves to give it dimension. I added pieces of corrugated cardboard underneath to give it depth. I am in love with the flowers in these papers. They are beautiful! They look like they flow so nicely on the layout. 
 

I fussy cut the leaves from the Leaves 3 cutting sheet. The leaves are so beautiful and realistic looking. I chose yellow flowers from my stash, and just enhanced them with the fussy cut flowers and leaves. To finish the layout off, I splattered some white gesso and distress paint onto the layout. I also added touched of gold leaf on the page. It gives it a bit of an elegant touch. 


I enjoyed working with Sapphire Days. I hope you are inspired to create a project using this beautiful collection. I am also enjoying my time here at Scrap and Me as a Guest Designer. It has been an honor. I will be back later this month with me last project. 


Scrap and Me Products Used:

Butterflies cut out paper

Sapphire Days 07/08

Sapphire Days (inside cover)

Sapphire Days Flowers

Leaves 3 sheet for cutting

Doors and Windows 2 cutting sheet

Tuesday, August 16, 2022

49 and Market Spectrum Sherbet...12x12 layout "Smile"

Hello Lovelies. Today I am going to bring you a ray of happy sunshine and rainbows, because we could always use a little of both!! The color range of Spectrum Sherbet seems endless for me! I have thoroughly enjoyed working with everything in this collection. There is so much to choose from. I created this 12x12 layout that I wanted to start off as simple. And it is!! The color scheme is already there for you, I just added a lot of product in the same colors! The paper I chose, spoke for itself. I just followed each color arranged on the paper, and enhanced it with gorgeous 49 and Market products!!! 


For the frames, I cut out the sample colors on the cover page from the Spectrum Sherbet Solids Pack. They were the perfect size. I cut each color apart, and die cut them using the perfect rectangle stitched die. I machine stitched on 2 of the frames, and on the other 2, I used the Curators Stitched Washi Tape. I saved the cut out peice from each rectangle and saved them. I die cut the photos using the smaller die from the same set, and popped them up using a piece of corrugated cardboard under each photo, and placed it back in the frame in the middle I placed each of the frames on top of the same colors on the paper. I  placed the tags in between the same range of colors, blue to green, yellow to pink. I chose flowers from multiple flower collections, and coordinated them with each color. I also punch out leaves from scraps of the paper from Spectrum Sherbet  and tucked them here and there.  


I created some mini rosettes using the Tim Holtz Rosette die, and used Wishing Bubbles for the middles. The title SHINE is chipboard. I also went though the laser cuts for butterflies, and found the coordinating colors. The chipboard set had the words I color coordinated with each framed photo. 


I used the Spectrum Sherbet 6x8 Leaves rub ons and placed the coordinating colors above and below each framed photo. Once all of the elements were down, I found some Lindys Gang Starburst sprays that matched each color, to smear and spatter around each color. 

  
Thank you for joining me today. I hope you are inspired to bring a little color into your life with Spectrum Sherbet. There is so much to love about this collection. xo

49 and Market Products Used:

Spectrum Sherbet Painted Foundations- Rainbow

Spectrum Sherbet Solids Pack

Spectrum Sherbet- 6x8 Leaves Rub On Transfer Set

Spectrum Sherbet Tidal Wave Laser Cut Elements

Spectrum Sherbet Chipboard Word Set

Spectrum Sherbet Tag Set

Spectrum Sherbet Strawberry Lemonade Laser Cut Elements

Spectrum Sherbet Chipboard Set

Spectrum Sherbet Wishing Bubbles and Baubles

Curators Washi Tape Stitch Set

Spectrum Sherbet Strawberry Lemonade Acetate Leaves

Royal Spray Sunshine Flowers

Royal Spray Passion Pink Flowers

Enchanted Petals Mint Flowers

Enchanted Petals Ballet Slipper Flowers

Royal Spray Ocean Jade Flowers

Rustic Blooms Bluejay Flowers

Pixie Petals Sunshine Flowers

Pixie Petals Flamingo Flowers


Monday, August 8, 2022

Scrap And Me Guest Designer

I am honored to be a Guest Designer for Scrap and Me. It has been such a pleasure working with their gorgeous papers. Today I am using the beautiful Spring Purple paper collection. And it is special to me, because purple is my favorite color. I also chose a special photograph of my grand daughter and my sisters grand sons. They are all about the same age. Cousins are the best. Grandchildren are very special!! I chose to use a meaningful quote about children. We love them so much. 

For the background paper, I used Spring Purple 02. I wanted to focus on the fussy cut flowers and leaves, so I chose a paper that did not have any design print on it. The paper itself is beautiful. A watercolor design that I love so much. 


From top to bottom, I created a strip using lace, cheese cloth, and jute. I attached the jute using tiny staples, then adhered the strip to the background paper offset to the side. I fluffed out the cheese cloth to distress it a little. 

.I created the sentiment in Photoshop by choosing the quote, creating the page in Photoshop, and  printed it on parchment cardstock. I cut it into strips, inked the edges and adhered it to down the strip above and below the photo. I backed each strip with chipboard to give it some dimension. 

I fussy cut the flowers from the Spring Purple Cutout Sheet, the leaves were cut from the Leaves 09 Cut

Out sheet, and the butterflies from the Butterflies Cut Out Sheet. I sat and fussy cut them all, then chose the ones that fir my design. I added a few purple flowers from my stash. Once the layout was finished, I used some distress ink and white gesso for the splatters around the design. That added the finishing touch. 


Thank you for joining me. I hope that you are inspired to create your own project using Spring Purple. 

Monday, August 1, 2022

49 and Market Curators Meadow "Nature Lover"

 Hello lovelies. Today I bring to you another layout created with Curators Meadow. A beautiful collection of everything meadow and woodlands. Perfect for the photos I take of my granddaughter in my back yard, who is a Nature Lover by heart. The earthy colors in the collection reflect the beauty in the wild life around us. Give a child a chance to explore, and they will create a world of their own. 

I started with the Curators Juniper paper. I machine stitched around the edges, and inked it with distress ink. I laid a foundation in the design shape I wanted on the paper, and started to build on to the design with all of the elements. There are so many fun elements in the Curators Meadow Laser Cuts and Ephemera bits packs. From small woodland animals, to butterflies, mushrooms, birds, and greenery. I must not forget the moths!! I love moths! I used 4 sentiment strips to tell a happy story on the theme of my layout. 


Laser Cut Elements are trimmed on the edge. Ephemera Bits have a small border around them. I like the look of the border as the piece stands out. I used the Essential Clip to attach the sentiment strip and the butterfly onto the Ephemera Bits Frame. I added small strips of corrugated cardboard to the underside of the frame so that I get some dimension on the layout.  Most of the elements are backed with the cardboard and the whole layout is dimensional.  I used some of the rub-ons on the outer edges of the vertical strip. You can use them instead of stamps and achieve the same look. They are easily cut apart to apply just about anywhere you need to. 


The love the small slide frames in a lot of the collections. For this frame, I added a smaller photo captured on another backyard adventure. Look at all of the beautiful Laser cut mushrooms!! Butterflies and moths fluttering around. 


I strung the Nature Lover round tag with the single ply jute, and attached it to the frame using tiny staples. I simply just love all of the natural elements used on this page. And unbelievable, but I didn't use any flowers!!! Say it isn't so!! I forgot the flowers! And looking back, this layout has so many wonderful laser cut elements that you don't even miss the flowers. Is it to late to tuck a few in??!! Nah...We will just leave it alone. This time....

Thank you for joining me. Grab those nature photos, some Curators Meadow, and start documenting those precious moments bought to you by mother nature herself. Until next time. xoxo

49 and Market Products Used:

Curators Meadow-12x12 Collection Paper Pack

Curators Meadow-Juniper

Curators Meadow-6x8 Rub-on Transfer Set

 Curators Meadow-Laser Cut Elements

Curators Meadow-Ephemera Bits

Vintage Artistry Essential Binder Clips

Jute Cording- Single Ply


Friday, July 29, 2022

Heartfelt Creations Alumni Design Team July 2022 Blog Hop


It is that time again! Time to get inspired, and have a chance to win! 
All you have to do is leave some love on each of the artists blogs, A  randomly chosen comment from one of the blogs will be chosen to win a $25 Heartfelt Creations Gift Card. Heartfelt Creations is also giving away a second $25 gift card for a randomly chosen comment from their blog.  You have until Midnight August 1st.  Then you will have 72 hours to claim the prize by emailing socialmedia@heartfeltcreations.com. Please write “Winner of the July 2022 Alumni Hop” in the subject line.The winners will be announced on the Heartfelt Creations blog and Facebook page on Wednesday, July 3rd.

Let the inspiration begin!!
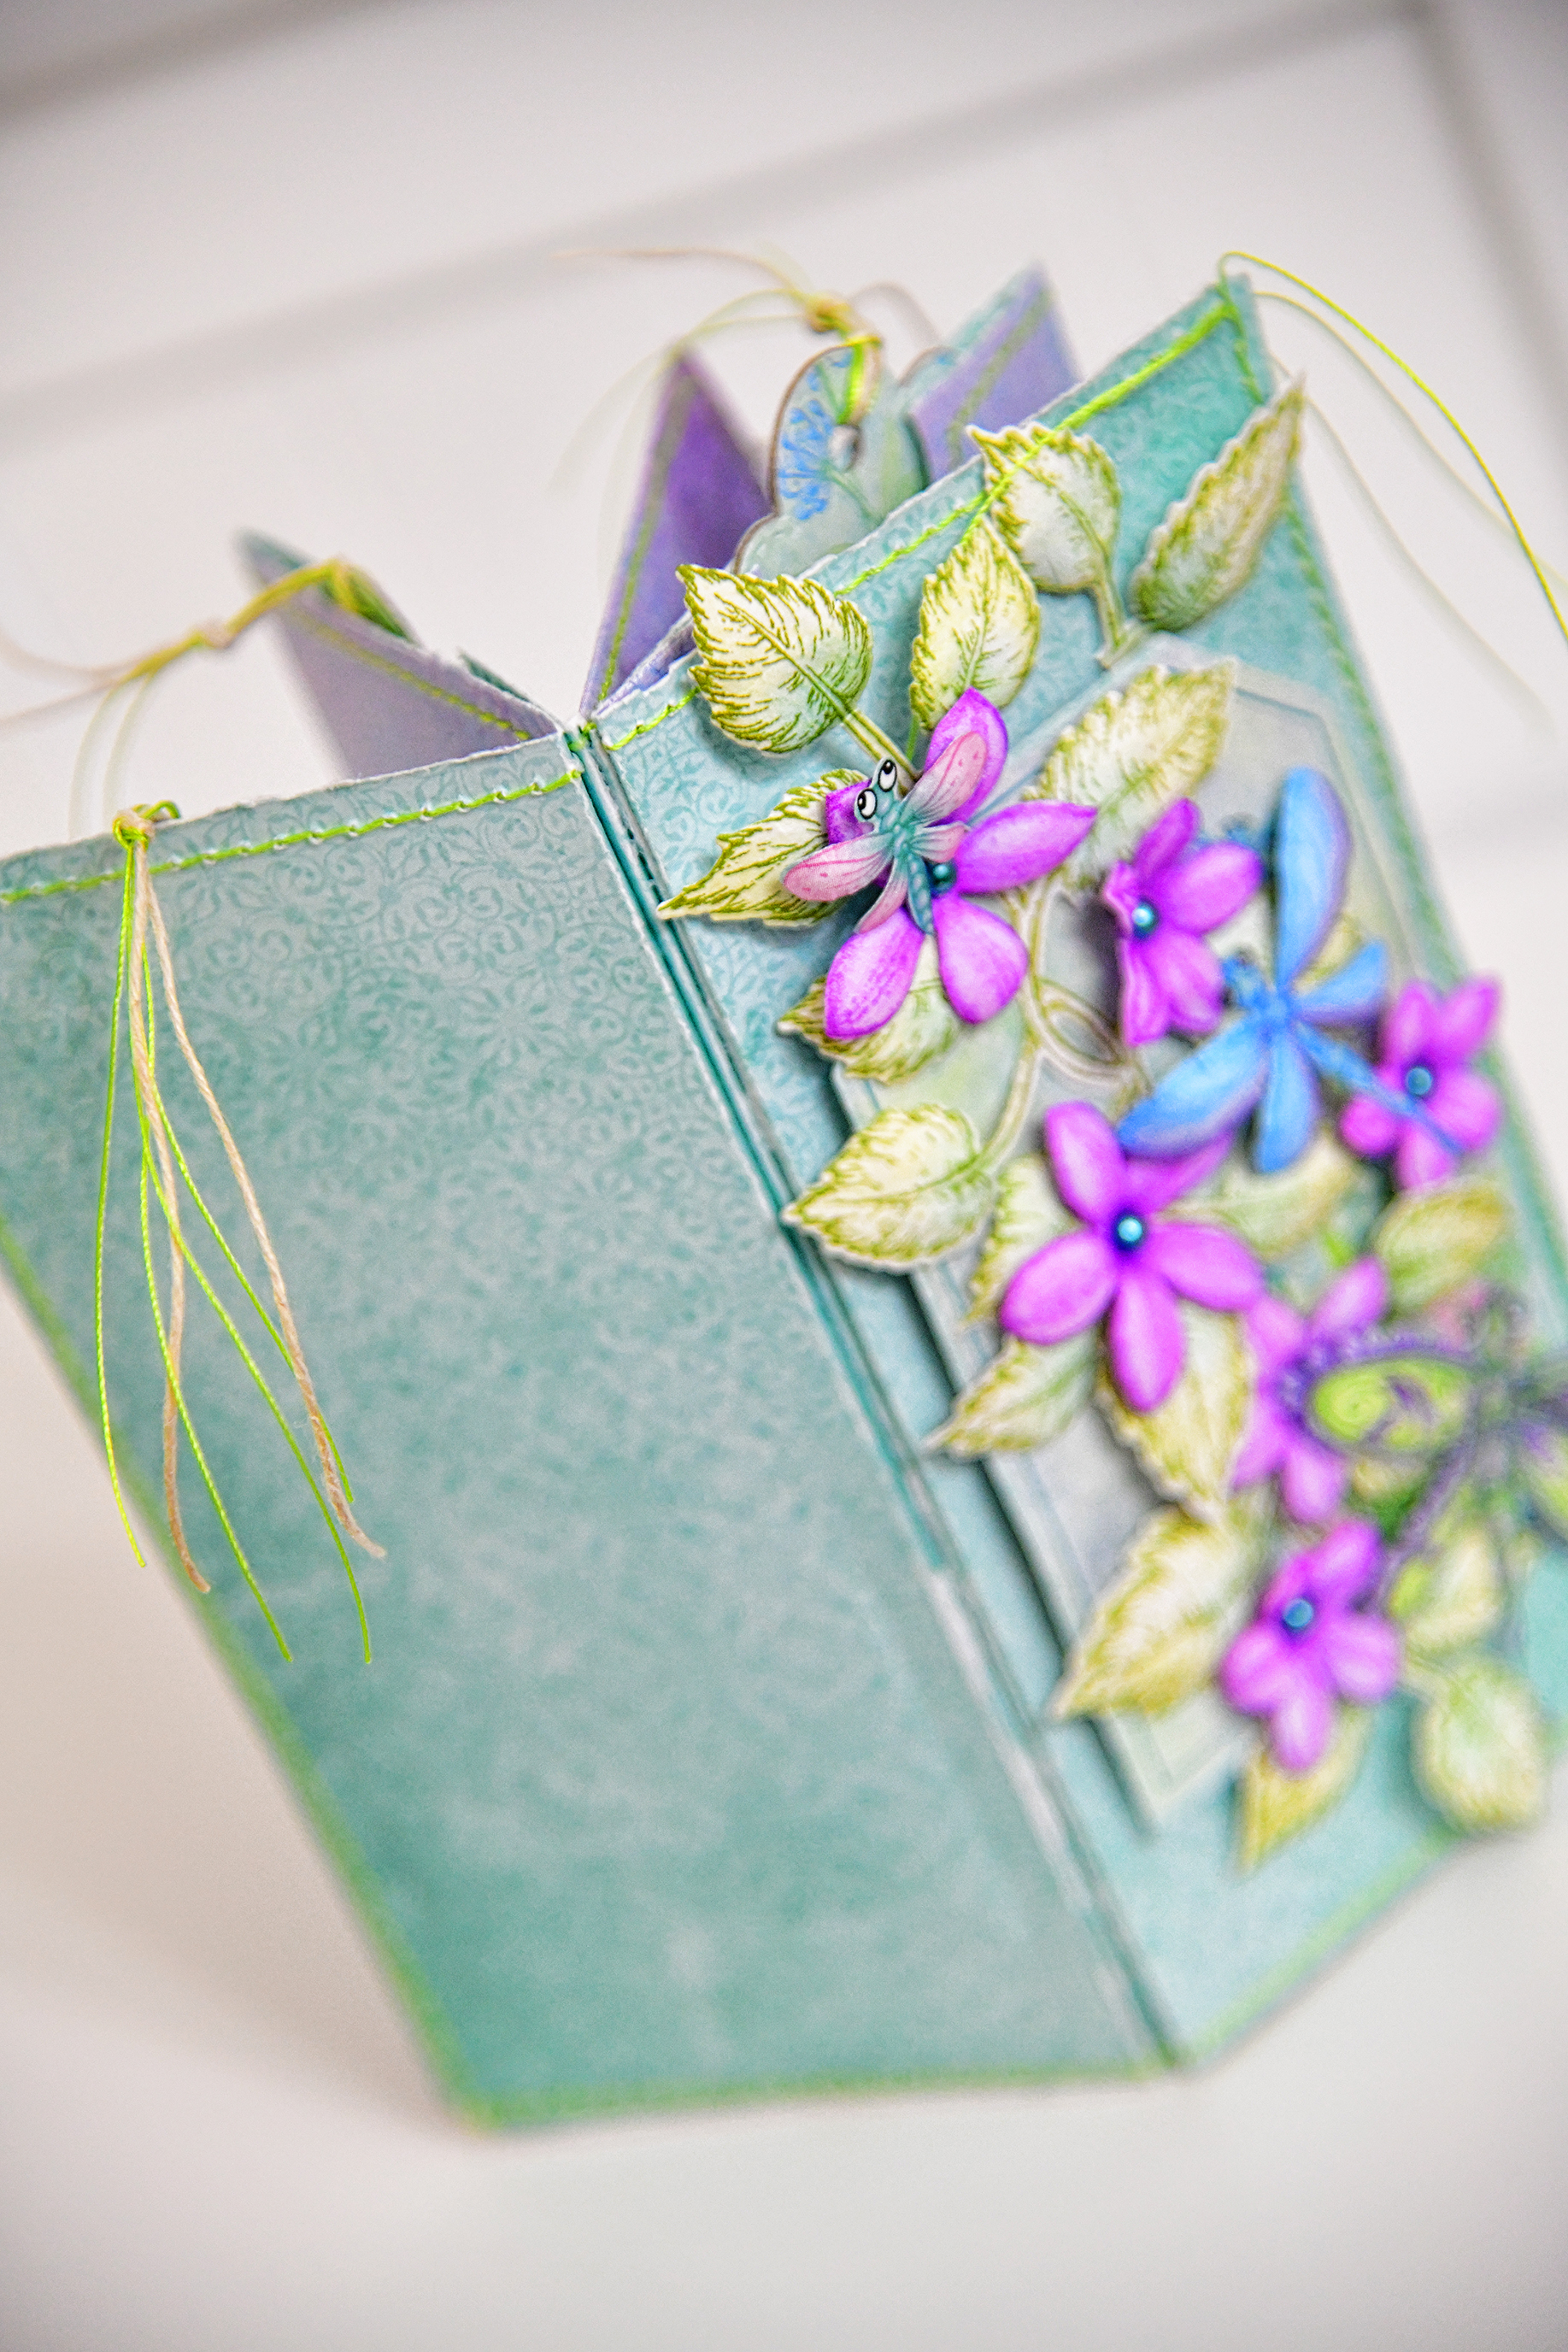
I chose to do a 1 Sheet Wonder mini album. Can you believe the album base was constructed using 1 12x12 sheet of paper!! So easy!! It measures 6x3 inches small. I chose a beautiful paper from the Decorative Dragonfly Paper collection. The colors are smashing!! 


The album ends up with a front, a back and 3 pages in-between. I did some machine sewing on the paper before folding and  constructing it. I left some of the threads hanging to give a little shabby chic look. 


Inside of each of the pocket pages, there are pockets filled with tags. Some were cut from the sheets of the collection, others I created a template for the larger tags, and hand cut them to fit the pockets. 


I used the Leafy Accents, and the Clematis Flowers to decorate the cover. I also fussy cut the dragonflies. There is a die that will die cut them, but I didn't have it. It would have been so much easier to die cut them! 


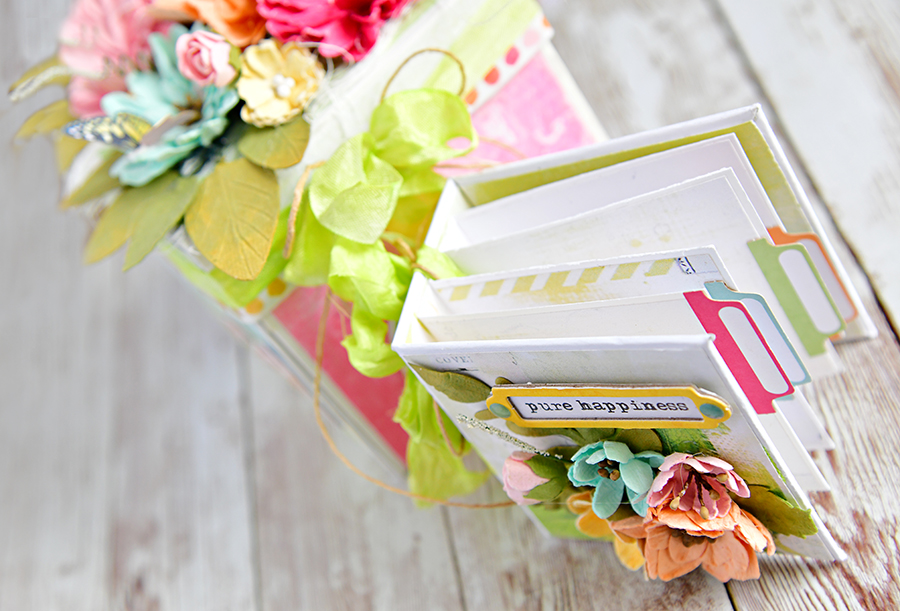
Two of the pockets are top pockets, and this one in the photo is a side pocket. It all depends on where you place your glue when adhering them together. I used a circle punch to the pockets as it makes it easier to slip the tags out. And if you are mindful of the pattern on the paper when you construct it, the design comes out perfectly when you fold it.  I love how this one came out.   
 

On this page I created a pocket for the tag, and on the tag, I created another pocket to fit a smaller tag. 


Here is another page with 2 tags slipped in tuck spots I created. 


Here is a close up of the flowers. I used the Art Foam to create them. I stamped and inked the flowers before I heat them on the iron. Then used a ball stylus to shape them further, right after they came off of the iron. I added little half pearls to the centers. Isn't that dragonfly darling!!??

Thank you for joining me for the hop!! Make sure to visit all of the artists for more inspiration! Good Luck on the win!! 

Heartfelt Creations Products Used:

Decorative Dragonfly Paper Collection

Clematis Die

Clematis Cling Stamp set

Leafy Accents Die

Leafy Accents Cling Stamp Set

Ranger Archival Ink Pad Fern Green

Ranger Archival Ink Pad Cactus Flower

Ranger Archival Ink Pad Majestic Violet

Ranger Archival Ink Pad Paradise Teal

Art Foam Paper Pack

Flower Shaping Essentials


Heartfelt Creations Blog Hop:

Kathy Clement- Kathy by Design

Vicki Dutcher- All I Do Is Stamp

Amarilys Doria- Amarilys’ Creations

Bozena- BBartCards

Lynn Stanborough- What the Heart Wants

Alissa Wells- Will Run for Stamps

This is ME!! Lisa Gregory- What a Beautiful Mess

Candy Slabaugh- Candy’s Creations

Gloria Stengel- Scraps of Life

Monica Edwards-  Simply Monica

Heartfelt Creations- Heartfelt Creations Blog


There are many tutorials to create different mini albums from 1 sheet of paper. This is the one I followed!! Eva of Bohemian Crafting. She shows 2 different versions. 

DIY Use Your Stuff 12x12 Books from 1 sheet (Step by step)


Wednesday, July 27, 2022


Scrap and Me "Spring Purple" collection


I am honored to be a Guest Designer for Scrap and Me. It has been such a pleasure working with their gorgeous papers. Today I am using the beautiful Spring Purple paper collection. And it is special to me, because purple is my favorite color. I also chose a special photograph of my grand daughter and my sisters grand sons. They are all about the same age. Cousins are the best. Grandchildren are very special!! I chose to use a meaningful quote about children. We love them so much. 


For the background paper, I used Spring Purple 02. I wanted to focus on the fussy cut flowers and leaves, so I chose a paper that did not have any design print on it. The paper itself is beautiful. A watercolor design that I love so much. 


 From top to bottom, I created a strip using lace, cheese cloth, and jute. I attached the jute using tiny staples, then adhered the strip to the background paper offset to the side. I fluffed out the cheese cloth to distress it a little. 

I created the sentiment in Photoshop by choosing the quote, creating the page in Photoshop, and  printed it on card stock. 

I fussy cut the flowers from the Spring Purple Cutout Sheet, the leaves were cut from the Leaves 09 CutOut sheet, and the butterflies from the Butterflies Cut Out Sheet. I sat and fussy cut them all, then chose the ones that fir my design. I added a few purple flowers from my stash. Once the layout was finished, I used some distress ink and white gesso for the splatters around the design. That added the finishing touch. 


Thank you for joining me. I hope that you are inspired to create your own project using Spring Purple. 

Saturday, July 16, 2022

49 and Market Curators Meadow 12x12 layout "Become one with nature"

 Hello lovelies. Today I bring you a 12x12 layout done with the fabulous new collection Curators Meadow. If you love mushrooms, moths, and anything found in a meadow, you are going to love this collection. It is beautiful, rustic, vintage and reminds me of the woods behind my home with all of the little creatures and earths delights. I love the greens and earth tones with the touch of blues, browns and rust colors running through the papers. And like many of the collections, you will have so many coordinating "accessories"  to choose from. The laser cuts are fabulous, and they are already cut for you! 

I started by layering the top designer sheet over one of the solids from the Solids paper pack. I love how the green brings out the greens on the page. I love saving as much paper as possible, so I cut out the middle of the green solid, and will save it for another project. I left a 1.5 inch border to work with. I cut the "field notes" paper down a bit and layered it over the solid green paper. Dont ever discount the design on back of the cover paper!! I fussy cut the frames to use on this layout. All 3 fit perfectly!! 

The laser cuts are simply fabulous! Just check out the beautiful twining stem that I used to frame the photo. And to hold each of the photos onto the frame, I used a postage stamp from the Washi Tape Postage Stamp roll, tore each of the stamps in half, and taped the photos to the frame. I love the little touches that make a big impact on projects. 


I used piece of corrugated cardboard in a couple of papers to give the layout a little more of a rustic feel. I added laser cut butterflies, the bird, and look at the strip of tiny mushrooms!! Aren't they sweet!!! I chose flowers from a few different collections. I love just love "picking" flowers out of my box!! So many beautiful 49 and Market flowers to choose from! If you see a pack you love, grab them because before you know it they retire! You can see the close up of how I used the washi potage stamps. 


And her is a cluster of one of the many mushrooms in this collection. There are a ton of laser cut mushrooms! I added a few piece of corrugated cardboard underneath to lift them up and give them dimension on the layout. It casts a little shadow and they become so real looking. I simply love the laser cuts. 


Thank you so much for stopping by to see my project this week. Make sure you visit the blog everyday as the 49 and Market designers wow you wit their beautiful projects. And pick up Curators Meadow. The collections is not only perfect for layouts, but art journaling, mini albums and cards. So much to be created!!! xo


49 and Market Products Used:

Curators Meadow 12x12 Collection Paper Pack 

Curators Meadow Postage Stamp Washi Tape

Curators Meadow Field Notes

Curators Meadow 12x12 Solids Collection Paper Pack

Curators Meadow Laser Cut Elements

Sunshine Enchanted Petals

Stargazers Lemondrop flowers

Sunshine Pixie Petals

Rustic Bouquet - Bluejay


Friday, July 1, 2022

Spectrum Sherbet Explosion Box with mini album

 Hello Lovelies. Today I bring you an Explosion Box with a surprise mini album inside. This time I used the beautiful papers in the Spectrum Sherbet Solids Pack and also the Foundation paper pack . I wanted to show the range of gorgeous colors in 1 project. This was the perfect project to do! A true confection! I used most of the colors in the range, sticking to the lighter shades. 


When you open the lid and the walls come tumbling down, you will find a tiny mini album. I constructed it using chipboard and covered it with paper and added 4 pages. Each page has a Spectrum Sherbet laser cut tab. The small tabs were the perfect size for this mini. I adhered 1 to each page. 

This is the view of the explosion box completely open. There are 3 layers. Each layer contains pockets, belly bands or foldovers. 

 
Inside of each pocket, belly band or fold overs, contains Spectrum Sherbet tags, accordion folded papers, and/or specimen cards, and small cards, all created with Spectrum Sherbet papers. I added Spectrum Sherbet Leaves rub- ons to each corner heart, and added the Roughly Sewn Rub Ons on the pockets. 


Here is a closeup of the mini album. It measures 3x3 inches. I hand tinted some Sari Ribbon using Distress Ink in Twisted Citron. It was the perfect color and matched the papers beautifully. I tied the ribbon, along with some Single Ply Jute around the spine. I decorated the cover with flowers, leaves, Spectrum Sherbet Chipboard, and a laser cut for the sentiment. I layered it behind the chipboard and added some Sherbet Wishing Bubbles and Baubles to simulate brads. 


I also used the ribbon and jute cording around the outside lid of the box. I chose a variety of flowers for the lid. 49 and Market has so many to choose from. Get them while you  can because they sell out really fast.  I used flowers from 7 different collections, but they all coordinate so well. At the base of the lid, I used Spectrum Sherbet Washi tape. The one with the dots. 49 and Market Washi Tape is so versatile. And so beautiful!! 

I hope you enjoyed this project, and you are inspired to create your own Explosion Box. I had a lot of fun creating this, and I think I can even add more surprise elements to it. Have a beautiful day!! xo


49 and Market Products Used:

Spectrum/Sherbet 12x12 Sherbet Solids Pack

Spectrum Sherbet 12x12 Sherbet Foundations Pack

Spectrum/Sherbet Tag Set

Spectrum/Sherbet Washi Tape Assortment Set

Spectrum/Sherbet Chipboard Set

Spectrum Sherbet Chipboard Words

Spectrum/Sherbet Essential Laser Cut Elements

Spectrum Sherbet Strawberry Lemonade Laser Cut Elements

Spectrum Sherbet-Leaves Rub On Transfer Set

Majestic Bouquet Flowers: Mango

Royal Posies Mango Paper Flowers

Royal Spray-Passion Pink Paper Flowers

Royal Spray-Bashful Paper Flowers

Enchanted Petals-Mint Paper Flowers

Garden Petals- Sea Glass

Sugar Petals-Tutti Frutti

Roughly Sewn Rub-Ons in white

Jute Cording Single Ply


Monday, June 27, 2022

Scrap And Me "Pink Blossom 2 paper collection"

I have been honored to Guest Design for Scrap and Me. I couldn't wait to work with this beautiful collection. Pink Blossoms 2. I have so many pictures of my granddaughter when she was born, and wearing pink! This photo goes perfectly with the Pink Blossom 2 Collection. 

I started by adhering the 12x12 paper on a piece of 12x12 corrugated cardboard using Mod Podge. After it dried, I wet the edges of the paper and cardboard and tore away  the paper along with the top layer of cardboard exposing the corrugated part of the cardboard. I distressed the ends of the top layers and tore and curled it in a  few places. Once I was satisfied with the distressing, I let it dry, then brushed the exposed cardboard with white gesso.


For the base of the photo mats, I used the Paper Blossoms 07/08, mounted it on 3 pieces of corrugated cardboard and did the same distressing treatment as I did with the background. I stacked them onto the background. I cut a door from the Windows and Doors 2, cut it in half, and tucked each piece on either side of the mat. I placed a piece of cardboard under the photo, and placed it in the middle. 


I fussy cut the leaves from the Leaves 4 sheet, and butterflies from the Butterflies sheet. I placed my flowers on opposite corners of the mat, then tucked the leaves in and around all of around the 49 and Market Stargazer flowers. I scattered some butterflies on the layout as well. I only adhered the butterflies by the bodies only, then fluffed up the wings. 


You can see the layers of dimension. I finished off the layout using Art Stones, rhinestones, and then spattered white paint over the floral and leaves clusters. I printed out the words "I Hope You Dance", and adhered it to the bottom of the photo. 


Scrap and Me Products Used:

Pink Blossom 2  (07/08)

Pink Blossoms 2 (01/02) 

Leaves 4

Doors and Windows 2

Butterflies

47 and Market Products Used:

Stargazers Petal Pink

Stargazers Simply White