
 I just love making my own flowers. My fave all time die is the Tim Holtz Tattered Florals..I think he needs to devise another with different petals...I think I am going to Sizzix myself and propose a few designs I have come up with!! lol...Well here is another flower tutorial for your creating pleasure. I used a combo of Moonshadow Mist and Glimmer Mist to color the cream card stock. Krissy intruduced us to Moonshadow Mist from Lindy's Stamp Company, and I have never looked back..I love them!! They are slightly different than Glimmer Mist as the colors pool like no other. Leave a gorgeous sheen in different hues. The look is gorgeous!! I usually top my flowers with a sheer Glimmer mist just to increase shimmer. I used Iridescent Gold on these flowers.
Product List:
Card stock in cream or white
Glimmer Mist or your favorite color spray
adhesive (glue)
chalk ink
Ranger foam Ink blender
Tim Holtz Tattered Flowers Die
Mcgill Starburst Punch
Craft Dryer
nonstick craft mat
Glimmer Mist or your favorite color spray
adhesive (glue)
chalk ink
Ranger foam Ink blender
Tim Holtz Tattered Flowers Die
Mcgill Starburst Punch
Craft Dryer
nonstick craft mat
 Step1.
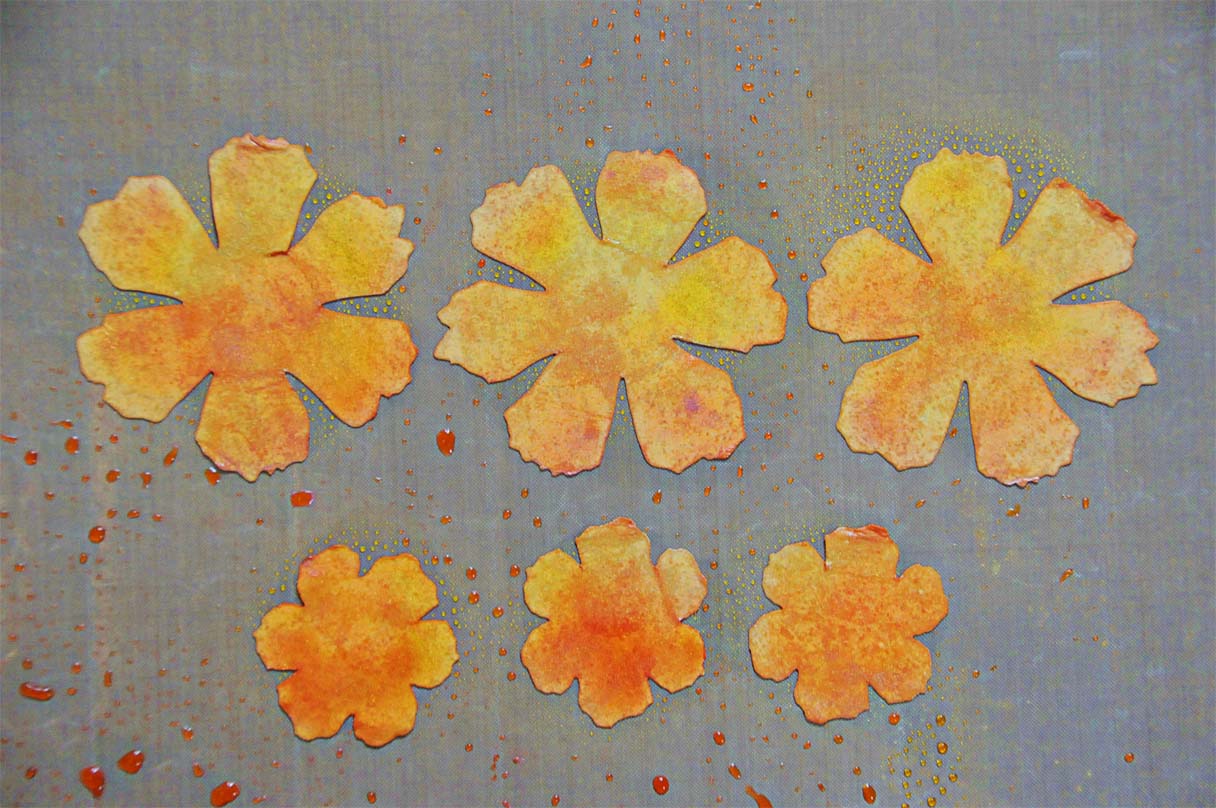
Die cut 3 big flowers, 3 medium sized flowers and punch 2 star burst.
 Step2.
Place your cuts on the craft mat and mist away!! You can swirl the flowers in the excess mist to soak them in the color. I used 2 different colors and a gold spray for shimmer.
 Step3.
Make slits in between each of the petals on the 3 medium sized flower, but DO NOT cut all the way to the center.
 Step4.
While still wet, Ink the edges on each of the flowers.
 Step5.
While the flowers are still wet, Crunch them and wrap them around the end of a paintbrush or pencil as shown, then dry them with a craft dryer.
 Step6.
Open up your dried flowers and flatten them slightly. Take one of the large flowers and curls each individual petal in different directions. Take another large flower and curl the ends inward toward the center of the flower, and take the last large flower and curl the ends slightly outward.
Take the smaller flowers and curl all of the ends outward. I use the handle of a small paint brush.
 Step7.
Start to layer your flowers.
Large flower with twisted petals on bottom, next place the flower with the petals curled outward.
 Step8.
Next place the flower with the petals curled inward on top.
 Step9.
Layer your 3 medium flowers together and fluff them up a bit.
 Step9.
Place the medium flowers into the center of the larger layered flowers.
 Step10.
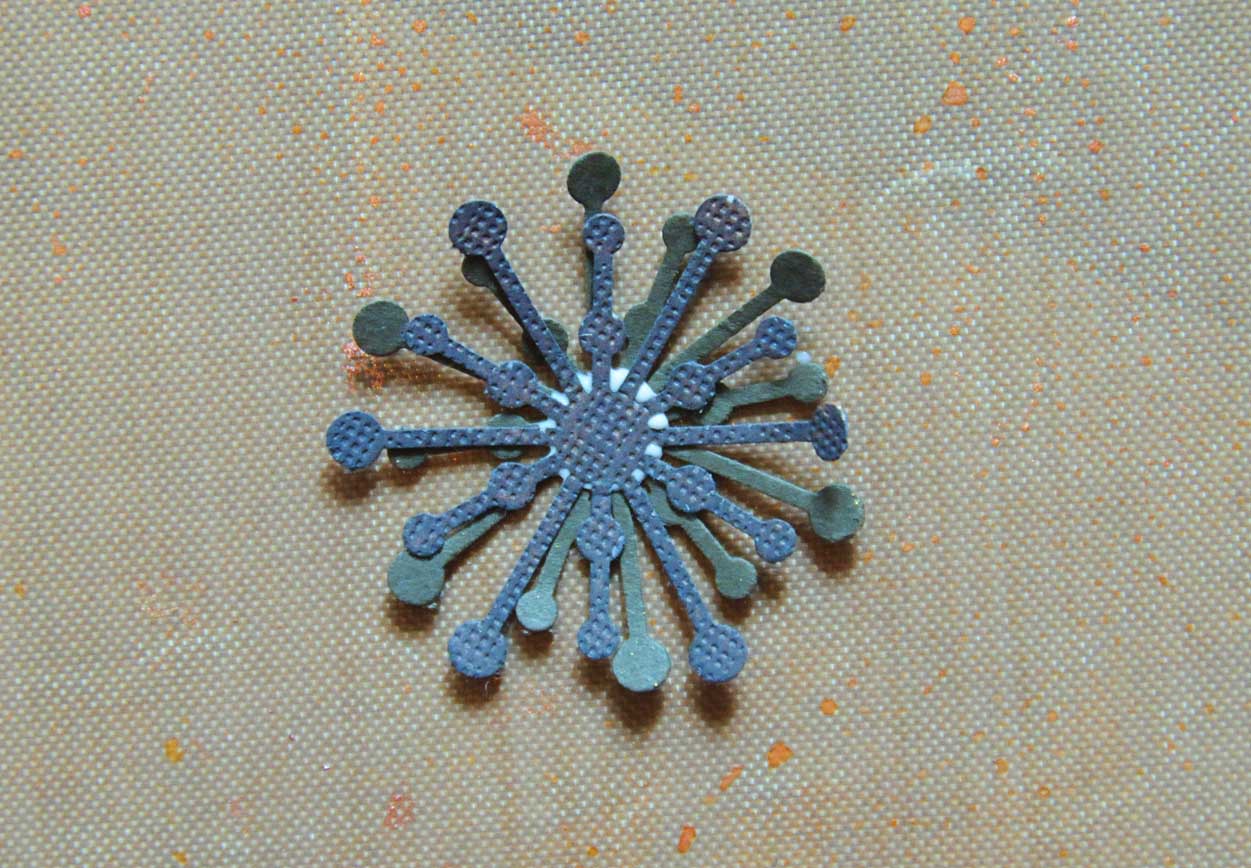
Layer your 2 punched starburst pieces.
 Step11.
Using your fingers, curl them into a bundle so they look like stamen.
 Step12.
Glue and tuck them into the middle of your flower.
 Here is your finished flower. Enjoy making these beauties. I would love to see your versions. Link them in your comments!!
Stunning Lisa...you are so amazingly talented.
ReplyDeleteWOW!! Those are beautiful!!
ReplyDeleteOh my word..those are Gorgeous.. if I had made these, they wouldn't of turned out half as great as yours did..LOL
ReplyDeletegotta try some of your flowers, just keep forgetting, my bad!!
Hugs
Nanné
WOW! These are the most amazing flowers! Thanks for sharing such a great tutorial!
ReplyDeleteI love this one! I have this added to my to do list! :) thank you
ReplyDeleteBeautiful flowers....got to find me that Starburst punch. You should go to Sizzix and if they aren't open you can go to AccuCut...they will create a die just for you from your original design....food for thought.
ReplyDeletewoww ...clever girl !!
ReplyDelete(being from the pacific islands originally... i found fascinating to discover a way to do hibiscus flowers all 'handmade' :) love it !!
What beautiful flowers..I really have to get the TH flower dies..
ReplyDeleteJust tried my first one tonight.
ReplyDeleteI used my cosmic shimmer mist
and it came out beautiful!
Maybe I'll share a pic after I
get one taken.
Kathy
Thank you so much for this wonderful tutorial. I love theese flowers and here is a link to what I did with the ones I made. :)
ReplyDeletehttp://ravndesign.blogspot.com/2011/05/scrapmester-2011-bidrag-3.html
Thanks so much! Lovely
ReplyDeleteLisa I just love these flowers! Thanks so much for sharing! Here's a link to show you my take on them.
ReplyDeletehttp://dreasscrapsofinspiration.blogspot.com/2011/09/color-room-palette-73.html
These are really pretty! I like the dark ink on the edges. It really adds to the dimension.
ReplyDeleteOh, wow! When I get some time, I'm going to have to try and tackle these!!
ReplyDeleteBeautiful flowers....you are genius....I really like it.
ReplyDeleteSend Flowers To Pakistan From Australia
Send Flowers To Pakistan From Australia
Send Flowers To Pakistan From Australia
these are lovely. x
ReplyDeleteMy friends and I just discovered your tutorials and what to do with Tim Holtz's die. Wow. Great instructions. Thanks so much!
ReplyDeletethis flower is stunning I am going to have to have that die cut!! TFS
ReplyDelete