Sunday, December 20, 2020

49 and Market Vintage Artistry Everyday..."100% Natural"


 Hello my friends! I simply can not believe this is my last 49 and Market project for 2020. This has been a creative year for me. I'm not done though. 2021 is going to be even better!!! Wait until you see what 49 and Market has in store for 2021...I am sooo excited!!! For this layout, I went rummaging through the edge of the forest behind my house. The Vintage Artistry Everyday Collection inspired me to go natural. First, I did some machine stitching around the perimeters of the 3 main layers in the layout. I adhered the background paper to some corrugated cardboard for stability, and then stripped a piece of corrugated cardboard from the packaging my Design Team box came in. Upcycling at its best! I tore some big pieces by hand, distressed it with gesso and colored mica spray, then layered it in between the larger and smaller layer. I wanted a bit of a rustic feel. I added some stenciling with texture paste using a Mini butterfly stencil designed by Janene Meyerowitz herself. Then the embellishing began. 

The flowers I used for this layout are gorgeous! They have the sweetest little pods on twirling wires in the Garden Petals collection.  With 12 pieces in the pack, its a beautiful set. I used the Salmon color. I perched the sweet little bird on the corner of my sentiment. He looks as though he ready to launch, and jump onto the twig nestled in the flowers. 

The laser cuts in the collection are just darling! Saves a lot of time as the fussy cutting is done for you already!. I perched this little bird on the corner of my inner layer. I collected twigs that still had moss attached. The colors blended so well with the greens in the laser cut leaves. I scattered some glitter epoxy coated bubbles from the Wedgewood Layered Embellishments. I wish you could see the sparking glitter in them!

Mixing the laser cut flowers and leaves with the flowers, makes for a wonderful floral cluster. You really don't have to add to much more other than an occasional beautiful butterfly to top it all off!

To frame the photo, I used the wreath from the Seaside Blooms floral collection. I added some of the fern leaves from the same collection, then topped them with the Salmon flowers. Once the entire layout was complete, I did some gold flecking on it. It just made the rustic page look more rich and refined. Or did it??. Either way, I love the sparkle and the shine. For the photo, I printed 2 copies. Using one of them, I cut out my grandaughter because I was going to add a different set of wings on her, but after cutting her out with the wings still attached, I decided to pop her off of the page for a 3d effect. I just layered the cutout over the same spot on the photo. I love the effect. Tucking in the laser cut flowers into the beautiful Garden Petal flowers created a lovely cluster. And the colors matched beautifully!. 


Thank you for joining me today. I hope you are inspired to collect some natural elements to add to your projects. And upcycle some cardboard!! You will be surprised how much beautiful texture it adds!


49 and Market Products Used:

Vintage Artistry Everyday 12x12 Collection pack

Wedgewood Layered Embellishments

Garden Petals Salmon

Seaside Blooms Cotton

Enchanted Petals Salmon

Pixie Petals Salmon


Saturday, December 12, 2020

Crealies November Guest Designer /November New Release dies

 I hope that you are inspired to mix and match your Crealies dies to create beautiful projects. Today I bring to you a Tag mini album that includes some of the new November releases. I had fun creating this mini, that may one day, hold photos and journaling of lovely memories. I used some 1.5 inch silk ribbon for the closure, by stringing them through the 1st and last eyelets on the tags. For this mini album, I used 49 and Markets gorgeous Vintage Remnants paper collections


The new November releases include the gorgeous flower and leaf dies used in this mini. CLDD59 Duo Dies Leaves  13, CLDD58 Duo Dies Leaves 12, CLDD58A Duo Dies Leaves 12 mirror image, CLSet61 Solid Flowers 26. They are used throughout the entire mini. I just created a batch made from using a couple of pieces of the watercolor/mixed media paper, and mixed the Pigment Colorzz using the spray bottles, and batch sprayed the flowers and leaves. The middles of the flowers are art stones adhered with glue. Once the glue dried I dabbed them with the CLPC 26 Pigment Colorzz Light Brown. For the flowers I used CLPC 13 Pigment Colorzz Blue. For the leaves I used CLPC22 Pigment colors Olive Green. Using my Cropadile, I added metal eyelets to the tops of the Tags. 


 I used CLBigLT13 for the tag pages and cut a total of 5 in different sizes to stagger the pages. In between each tag I used CLNestXXL24 and cut them down to size so that every page is staggered and can flip open easily. Once you cut them down to the size you need, place the die back on the pieces and run just the bottom through the die machine only part way so that you have the stitch lines all around. You can create ANY size you want using this technique.


On the inside cover. I used 2 CLJP 653 Pocket Small. I created the inserts, then used CLOTE49 On The Edge with double stitch and double dots to top the tags so they pull out easily. I used 2 different word sets to create the words on these 2 pages. Lovely Moments and Wonderful Memories. 


The word dies are simply precious!! The beauty of the word dies is, if you have all of the sets, you can mix and match the words to create many different phrases. I did this for versatility throughout the mini. 


I used the CLTD111 Wonderful Memories word die on this page. 


I used the CLTD109 Lovely Moments on this page. 


I created the AWESOME CLJP654 Harmonica Pocket  and adhered it to this page. I used the inner die from the set to create the tags that I stuck in the pockets.
 

        I used the   CLOTE50 On The Edge  to create the tag tops. 


Here is a close up of the side of the CLJP654 Harmonica Pocket. You can stick many tags in each pocket. 


This page has the CLTD114 Always Remember words. 


This is another CLJP654 Harmonica Pocket with the CLTD 110 Together Forever words. The tags were created the same way the others were. 


This is just another side view of the CLJP654 Harmonica Pocket


I used both CLTD114 Always Remember and CLTD112 I Love You & Me xoxo to create Remember Love words. 


I mixed a few of the words dies to create the back cover page. 


This is top view of the mini. There are a total of 8 page all together. 

I used my Zutter Binder to bind all of my pages together. I hung a handmade boho bead to it. But you could easily tie ribbon around the spine for a frilly edge. 


Video
https://www.youtube.com/watch?v=B1gs1kbrFe4&feature=emb_logo

Quick Bonus Project: 

Pigment Colorzz Color Chart

I created a cute little color chart for my 15 Pigment Colorzz, plus the Pearl Powder Gold and the  Pearl Powder White Silver.  I die cut tags and eyelets from the watercolor/mixed media paper. I adhered the eyelets to the tags. On one side of the tag, I wrote the color of the Pigment Colorzz I used on that tag. Using a non stick craft mat,  I mixed a tiny bit of the pigment powders with water and painted them onto each tag. After the tags were dried, I used a stainless steel ball chain to string them together. So now when I want to use one of my Pigment Colorzz, I can see exactly what the color looks like on paper. A cute little flip-through for easy reference. 


Thank you for joining me today. I hope that you are inspired to grab some of your favorite Crealies products and create your own projects. xoxo. 

Crealies Products Used:

Crealies Dies

CLTD109 Lovely Moments

CLTD111 Wonderful Memories

CLTD114 Always Remember

CLTD112 I Love You & Me xoxo

CLTD 110 Together Forever

CLOTE50 2x 10.5cm + double stitchline

CLOTE49 On The Edge with double stitch and double dots

CLOTE50 On The Edge

CLJP 653 Pocket Small

CLJP654 Harmonica Pocket

CLBigLT13 with stitchline Big Labelzz & Tagzz

CLNestXXL24 Rectangles with stitchline

Crealies Mixed Media

CLPC 26 Pigment Colorzz Light Brown

CLPC 13 Pigment Colorzz Blue

CLPC22 Pigment colors Olive Green

CLBS104 Watercolor / Mixed  Media paper 15x A4

CLPC99 Spray Bottles

Crealies November Release Products Used: (new)

CLDD59 Duo Dies Leaves  13

CLDD58 Duo Dies Leaves 12

CLDD58A Duo Dies Leaves 12 mirror image

CLSet61 Solid Flowers 26


Other Products Used:

49 and Market Vintage Remnants Paper Collection

Zutter Bind It All


Saturday, December 5, 2020

"All Good Things" 12x12 layout. 49 and Market Vintage Artistry Wedgewood Collection

 Hello my beautiful friends. December is upon us, and so is one of the newest collections from 49 and Market. Vintage Artistry Wedgewood! The colors are so beautiful!! Every single design on the papers is gorgeous!! I used 1 peice of paper from the collection for this layout, showcasing both sides. I simply cut a square out of the middle of the paper and flipped it to the opposite side. I mounted it on some corrugated cardboard using Mod Podge, and distressed the edges. I used some crackle paint and Lindys Magical Shakers in Antique Gold and Bratwurst Brown, mixed in water, to paint over the crackle paste. I used some distress ink to ink the edges of the papers. Oh!! And don't forget the Wedgewood Layered Embellishments!!! They add a whole new dimension to your projects. I used some leaves at the bottom of the layout hugging the sentiment. All Good Things. Like the gorgeous gold leaf my granddaughter is holding in the photo. My cousin mailed me some Autumn leaves form New York, because we don't have that season in Florida. 

Here is a closeup of the floral cluster. I used some of the laser cut leaves from the Seaside Mini Collection and tucked them under the flowers and layers. I love how you can use pieces from different collections, and they all seem to match perfectly! Even with the newest Collections, I pull out the older ones to see what I can use! I always find something! 


I love the laser cuts in the collection. This wooden look frame was perfect for this photo of my granddaughter. I inked the edges with Vintage Photo distress ink, and a bit of the Lindys Shakers mixed with water. I placed it on some corrugated cardboard for height and dimension, then adhered it to the background, and popped the photo in it. 


I created the flower clusters using flowers from 3 different packs. Parchment, Cobalt blue, and Sky, were the  perfect colors for these papers. I planted some butterflies here and there, using some clear glitter to make them sparkle. I also add the glitter to the little laser cut sequins and beads, and scattered them throughout the page. They look like real sequins! But prettier! 


Thank you for joining me today. I hope that you will give Wedgewood a try. It really is a perfect blend of gorgeous rich colors. I have one more project for 2020! In the meantime check back to the 49 and Market blog often, to see what the Design Team has created for your inspiration! I know I am always awed by their work!! xoxo


49 and Market Products Used:

Vintage Artistry Wedgewood 12x12 Collection Pack 

Vintage Artistry Wedgewood-Breeze paper

Wedgewood Layered Embellishments

Seaside 12x12 Mini Collection

Country Blooms Cobalt

Country Blooms Sky

Garden Petals Parchment

Pixie Petals Parchment

Roughly Sewn Rub-Ons in white

Lacey Trims Cream


Friday, November 27, 2020

Heartfelt Creations Black Friday New Release Blog Hop

 Welcome Heartfelt Creations Fans!!You are going to love Heartfelt Creations new Gateway Dies! They are so versatile. One die set will give you many different looks. Imagine having all of the sets and be able to mix and match! The designs would be endless!! This is a chance to win a 25.00  Gift Certificate to the Heartfelt Creations online store. 


 I had so much fun creating this trifold card. I used the Ornate Flourish Gateway Die HCD2-7326 for my card. The card base makes it easy for you to just die cut your papers, and adhere to the base. 


The Wild Rose Paper Collection is gorgeous! I used it for my card. There is one page that has flowers and leaves on it. All I had to do was use both the Small Wild Rose Die and the Large Small Wild Rose Die to cut them out. Then I spritzed them slightly with water, and placed them in Large 3D Wild Rose Shaping Mold for the leaves, and the Small Wild Rose Shaping Mold for the flowers. If you wanted, you could also use the stamps on the flowers and leaves. I chose not to stamp them to bring out the beauty in the ornate background of the card. I added some mixed  Prills to the centers. I also added Crystal Clear to both the flowers and the leaves for beautiful sparkle. 


I cut out one if the sentiments from the  paper pack, and matted it on another piece of paper, then placed a small piece of chipboard under it. I adhered it to the front of the card, and created a little silk ribbon bow, and placed it under the sentiment. I added a smaller cluster of flowers on the bottom corner of the card. 

The base is a trifold card. I am going to finish the card on the inside after I receive my new Elegant Gateway Cling Stamp Set. It pairs perfectly with all of the dies. 


Thank you for hopping with us on  this awesome Black Friday!! Be sure to finish the hop, and leave a comment on all of the designers blogs, for a chance to win a 25.00 Gift Certificate from Heartfelt Creations. 

Heartfelt Creations Products Used: 

The Wild Rose Paper Collection

Small Wild Rose Die

Large Small Wild Rose Die

Large 3D Wild Rose Shaping Mold

Small Wild Rose Shaping Mold

Rock N Roll Prills 12 Pack

Rajni Chawlas Crystal Clear


Kathy Clement
https://www.kathybydesign.com

Sarah Miller -https://plainandfancypapercrafts.blogspot.com/

Vicki Dutcher - https://allidoisstamp.blogspot.com/

Sandy Hulsart - http://creativemomentswithsandy.blogspot.com/

Candy Slabaugh - http://candyscreationsblog.blogspot.com/

Kerry Urbatch - https://thestampingbug.blogspot.com/

Magdalena Ruta - https://scrapdesign-handmade.blogspot.com

Emily Niehaus - http://emmielouwho.blogspot.com/

Amarilys Doria - http://amadrian8.blogspot.com/

You are Here!! Lisa Gregory -  http://what-a-beautiful-mess.blogspot.com/

Oksana Clegg - http://everydaycrafting.blogspot.com/

Alissa Wells -  http://willrunforstamps.blogspot.com/

Carole Wright-  http://theprettypaperpatisserie.blogspot.com/

Piyanki Biswas - https://itssimplyhandmade.blogspot.com/


Friday, November 20, 2020

Woodland Fairy created for 49 and Market Using Vintage Remnants

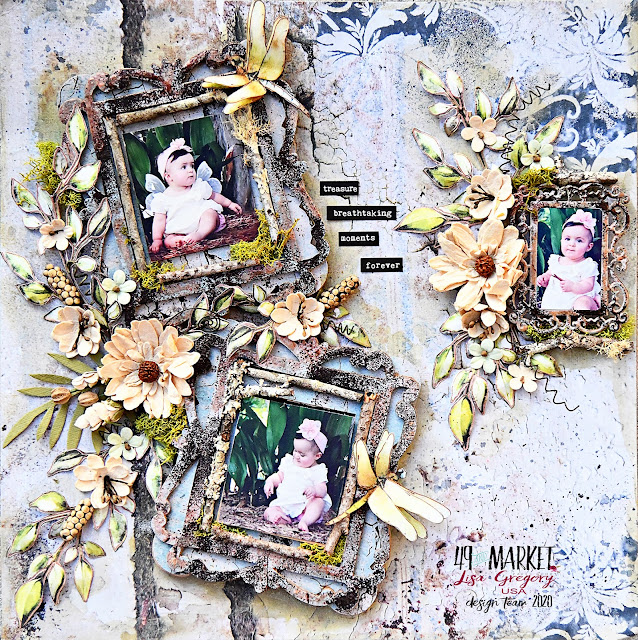
 Hello Lovelies. This week I have a layout created from a collection that is a little older. While eagerly waiting on the new collections, (Have you seen the brand new Remnants 12x12 Mini Collection???) I checked my stash for something that screamed rustic and rusty. No9 paper from the Vintage Remnants Collection was perfect! I love the rusted elements in this layout so much. Once in a while I like to get down and grungy, and still add beautiful elements to my projects. I did very little color wash on the background as I didn't want to take away from the beautiful details and color on this paper design. I flecked on a bit of black paint, and added a slight green color wash around the photos, but that was it. For stability, I adhered the background paper to a piece of 12x12 heavy chipboard. I plan to use this layout in a shadowbox  frame. 


I simply love the laser cuts that are included in the mini collections. I used the leaves from the Bold and Beautiful collection. I love vines, and these are gorgeous! I did tear one of them apart to tuck under the floral clusters. The enchanted florals are beautiful! They compliment the colors in the paper. I die cut the frame for the photo, and saved the inner piece of the frame to use as a base and guide for the photo. 


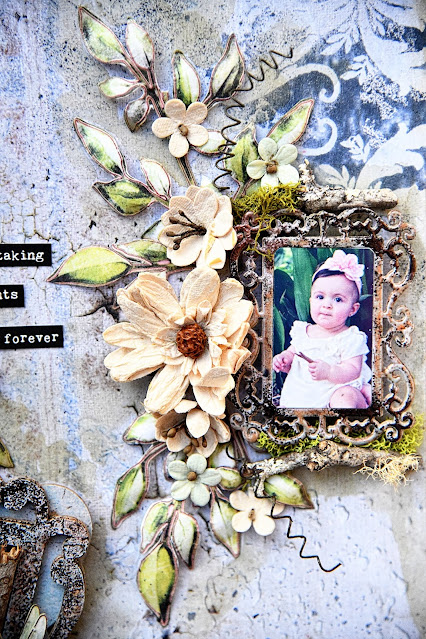
I die cut the frames from older dies I have, and the 2 dies that I used are some of my favorites. I use them quite often. This time I die cut corrugated cardboard, then die cut them again using Paper No10 and adhered it to the die cut cardboard.  I heat embossed the top die frame using 3 different embossing powders to match the rust in the paper, then adhered it to the bottom die cut frame. They came out perfect! I added moss and some twigs that were growing moss on them. I find them on the ground, in my yard, on the edge of the woods. I used the dragonflies Laser Cuts from the Serendipitous collection and inked them a bit with green and brown ink. I framed my little woodland fairy perfectly. 


I think the neutral colors of the flowers plays up beautifully in my woodland theme. Tucking in a few pieces of moss helps to bring out the beauty. 


And just another closeup of the frames that I have created for my wee woodland fairy. 


Thank you for spending the time here today. I hope you are inspired, and I hope that you take a walk in nature, and find the little natural things to add to your next project. xoxo


49 and Market Products Used:
Vintage Remnants Paper No 09
Vintage Remnants Paper No10


Lindys Stamp Gang Products Used:
My Mojito Green Starburst Spray
Cleopatra's Copper Embossing Powder
Midnight Pewter Embossing Powder
Midnight Bronze Embossing Powder


Thursday, November 5, 2020

49 and Market "It's the Great Pumpkin Charlotte"

Hello Friends. Today I am here to inspire you with a layout created with Vintage Artistry Shore collection, featuring laser cuts from the vintage Artistry Coral collection. I started the background by adhering the bonus  12x12 piece of paper (The back of the cover of the collection pack) from the shore collection to a piece of corrugated cardboard. Then I adhered a slightly smaller piece of paper (Tritons Shell) to another piece of corrugated paper and adhered it to the larger one. This set my base for decorating. I added the fabulous Roughly Sewn rub-ons in opposite corners, and Washi Tape in the lower right hand corner. 

The photo was matted on top of a layered cluster that I created using elements from the Shore Ephemera pack. I did some machine sewing on a couple of the pieces and distressed the edges. I tucked in some  leaves that I die cut from papers in the 6x6 paper pack. I tucked in the flowers, wire curls, and distressed berries around the layered ephemera.  The laser cut butterflies are from the Vintage Artistry Coral paper pack. The paper twine wreath was used under a die cut tag, and I adhered the photo to the tag and placed the file folder on the top of the photo. I used a couple of strands of jute through the hole in  the tag. I did some stamping around the edges of the cluster.


The cluster on the opposite side was also created by layering pieces from the Ephemera Stack. I die cut some lacey butterflies and leaves using papers from the Shore 6x6 paper stack. I just stacked and added layers using chipboard underneath for height and depth. Once all of my elements were in place, I did some stamping and added Wishing Bubbles and Art Stones to finish the layout.


Just a closeup of my cutie on the day we were carving her pumpkin. 

I hope that you are inspired to create your own layered layout. It is always fun for me to keep stacking, then enjoy seeing the end result. 


49 and Market Products Used:

12x12 Vintage Artistry Shore Collection

6x6 Vintage Artistry Shoe Collection papers

Vintage Artistry Shore Ephemera Stack

Roughly Sewn Rub-Ons in black

Vintage Shades Botanical Blends Blue

Garden Petals Salmon

Pixie Petals Salmon

Wishing Bubbles Cream Soda

Vintage Artistry Coral 12x12  Collection Pack 

Snapshots of Yesterday Stamp 

Jute Cording 5 ply

Vintage Artistry Sage Washi Tape


Friday, October 30, 2020

Heartfelt Creations Alumni October Blog Hop


A randomly chosen comment from a mystery blog will receive a $25 gift certificate to shop at Heartfelt Creations. To claim your prize please email Heartfelt Creations at socialmedia@heartfeltcreations.us with "Winner of the October Alumni Hop" in the subject line.

I have chosen to create a mini album/card. After receiving the Wild Rose paper collection, my mind went into creative overdrive. So many gorgeous designs in one paper pad. I found that all of the little tags labels and designs are perfect embellishments for a mini album. This mini is 5x4 inches. I used chip board for the base, and covered it with a piece of the Wild Rose paper. I die cut a scalloped rectangle from the Eyelet Rectangle and Basics die for the cover. I popped it up with some pop dots. I fussy cut a label, the Happiness Always sentiment, and popped them up with Pop Dots as well. Then the decorating began. 


For the flowers I chose the Arianna Blooms flowers. I die cut them using watercolor paper, painted them with watercolor, green in the middle and purple on the outer petals. I used crystal Clear and Babys Breath Ultrafine Transparent Glitter on the flowers and leaves. The pink shimmer is subtle and beautiful. The leaves are the beautiful Leafy Accents which I stamped, die cut and shaped in the molds. So simple yet so elegant!! I Used watercolors to paint them as well. 


The inside of the mini was lined with coordinating paper from the Wild Rose paper collection. I created a tuck pocket on the inside cover. I fussy cut the tags to insert into the pocket. I fessy cut the label, and popped it up with some chipboard. I added 2 pages for some journaling, but you can easily add more paper/pages using you favorite binding technique. I added 2 strips and die cut a border using the scalloped die to create more tuck spots for tags. 


Thank you for joining us today on the Blog Hop. Make sure to comment on each designers blog creation, and you just may find your self a winner!! xo


Thursday, October 29, 2020

Heartfelt Creations Alumni October 2020 Blog Hop


A randomly chosen comment from a mystery blog will receive a $25 gift certificate to shop at Heartfelt Creations. To claim your prize please email Heartfelt Creations at socialmedia@heartfeltcreations.us with "Winner of the
October Alumni Hop" in the subject line.

I have chosen to create a mini album/card. After receiving the Wild Rose paper collection, my mind went into creative overdrive. So many gorgeous designs in one paper pad. I found that all of the little tags labels and designs are perfect embellishments for a mini album. This mini is 5x4 inches. I used chip board for the base, and covered it with a piece of the Wild Rose paper. I die cut a scalloped rectangle from the Eyelet Rectangle and Basics die for the cover. I popped it up with some pop dots. I fussy cut a label, the Happiness Always sentiment, and popped them up with Pop Dots as well. Then the decorating began. 


For the flowers I chose the Arianna Blooms flowers. I die cut them using watercolor paper, painted them with watercolor, green in the middle and purple on the outer petals. I used crystal Clear and Babys Breath Ultrafine Transparent Glitter on the flowers and leaves. The pink shimmer is subtle and beautiful. The leaves are the beautiful Leafy Accents which I stamped, die cut and shaped in the molds. So simple yet so elegant!! I Used watercolors to paint them as well. 

The inside of the mini was lined with coordinating paper from the Wild Rose paper collection. I created a tuck pocket on the inside cover. I fussy cut the tags to insert into the pocket. I fessy cut the label, and popped it up with some chipboard. I added 2 pages for some journaling, but you can easily add more paper/pages using you favorite binding technique. I added 2 strips and die cut a border using the scalloped die to create more tuck spots for tags. 


Thank you for joining us today on the Blog Hop. Make sure to comment on each designers blog creation, and you just may find your self a winner!! xo


Heartfelt Creations Products Used: