
I created this project for 49 and Market. I love creating folios. This time I created 2 of them. Similar in size and structure, but using different patterned paper from the Vintage Artistry Collectors Edition Volume 2. The range of colors in the collection is beautiful. The collection is packed with papers, laser cuts and washi tape. The design of the folio is pretty simple. It is a great way to use up some of your smaller piece scraps to create pockets and tags. Of course what cover would not be complete with out the gorgeous flowers and ephemera!. I hope you are inspired to create your own folio. I have the step by step instructions on how to create one of your own. Plenty of room for photos and journaling.

Pair of 8"x4" sized Trifold Folios.

Step by Step instructions:
Using 1 12x12 sheet of patterned paper, Cut it down to 8 inches, bearing in mind, where you want to see the design on the outside of the Folio. Put aside the 4 inch cutaway piece.

Using a scoreboard, place the 8 inch paper on the board with long side left to right, and score at 3 3/4, 4, 8, and 8 1/4.

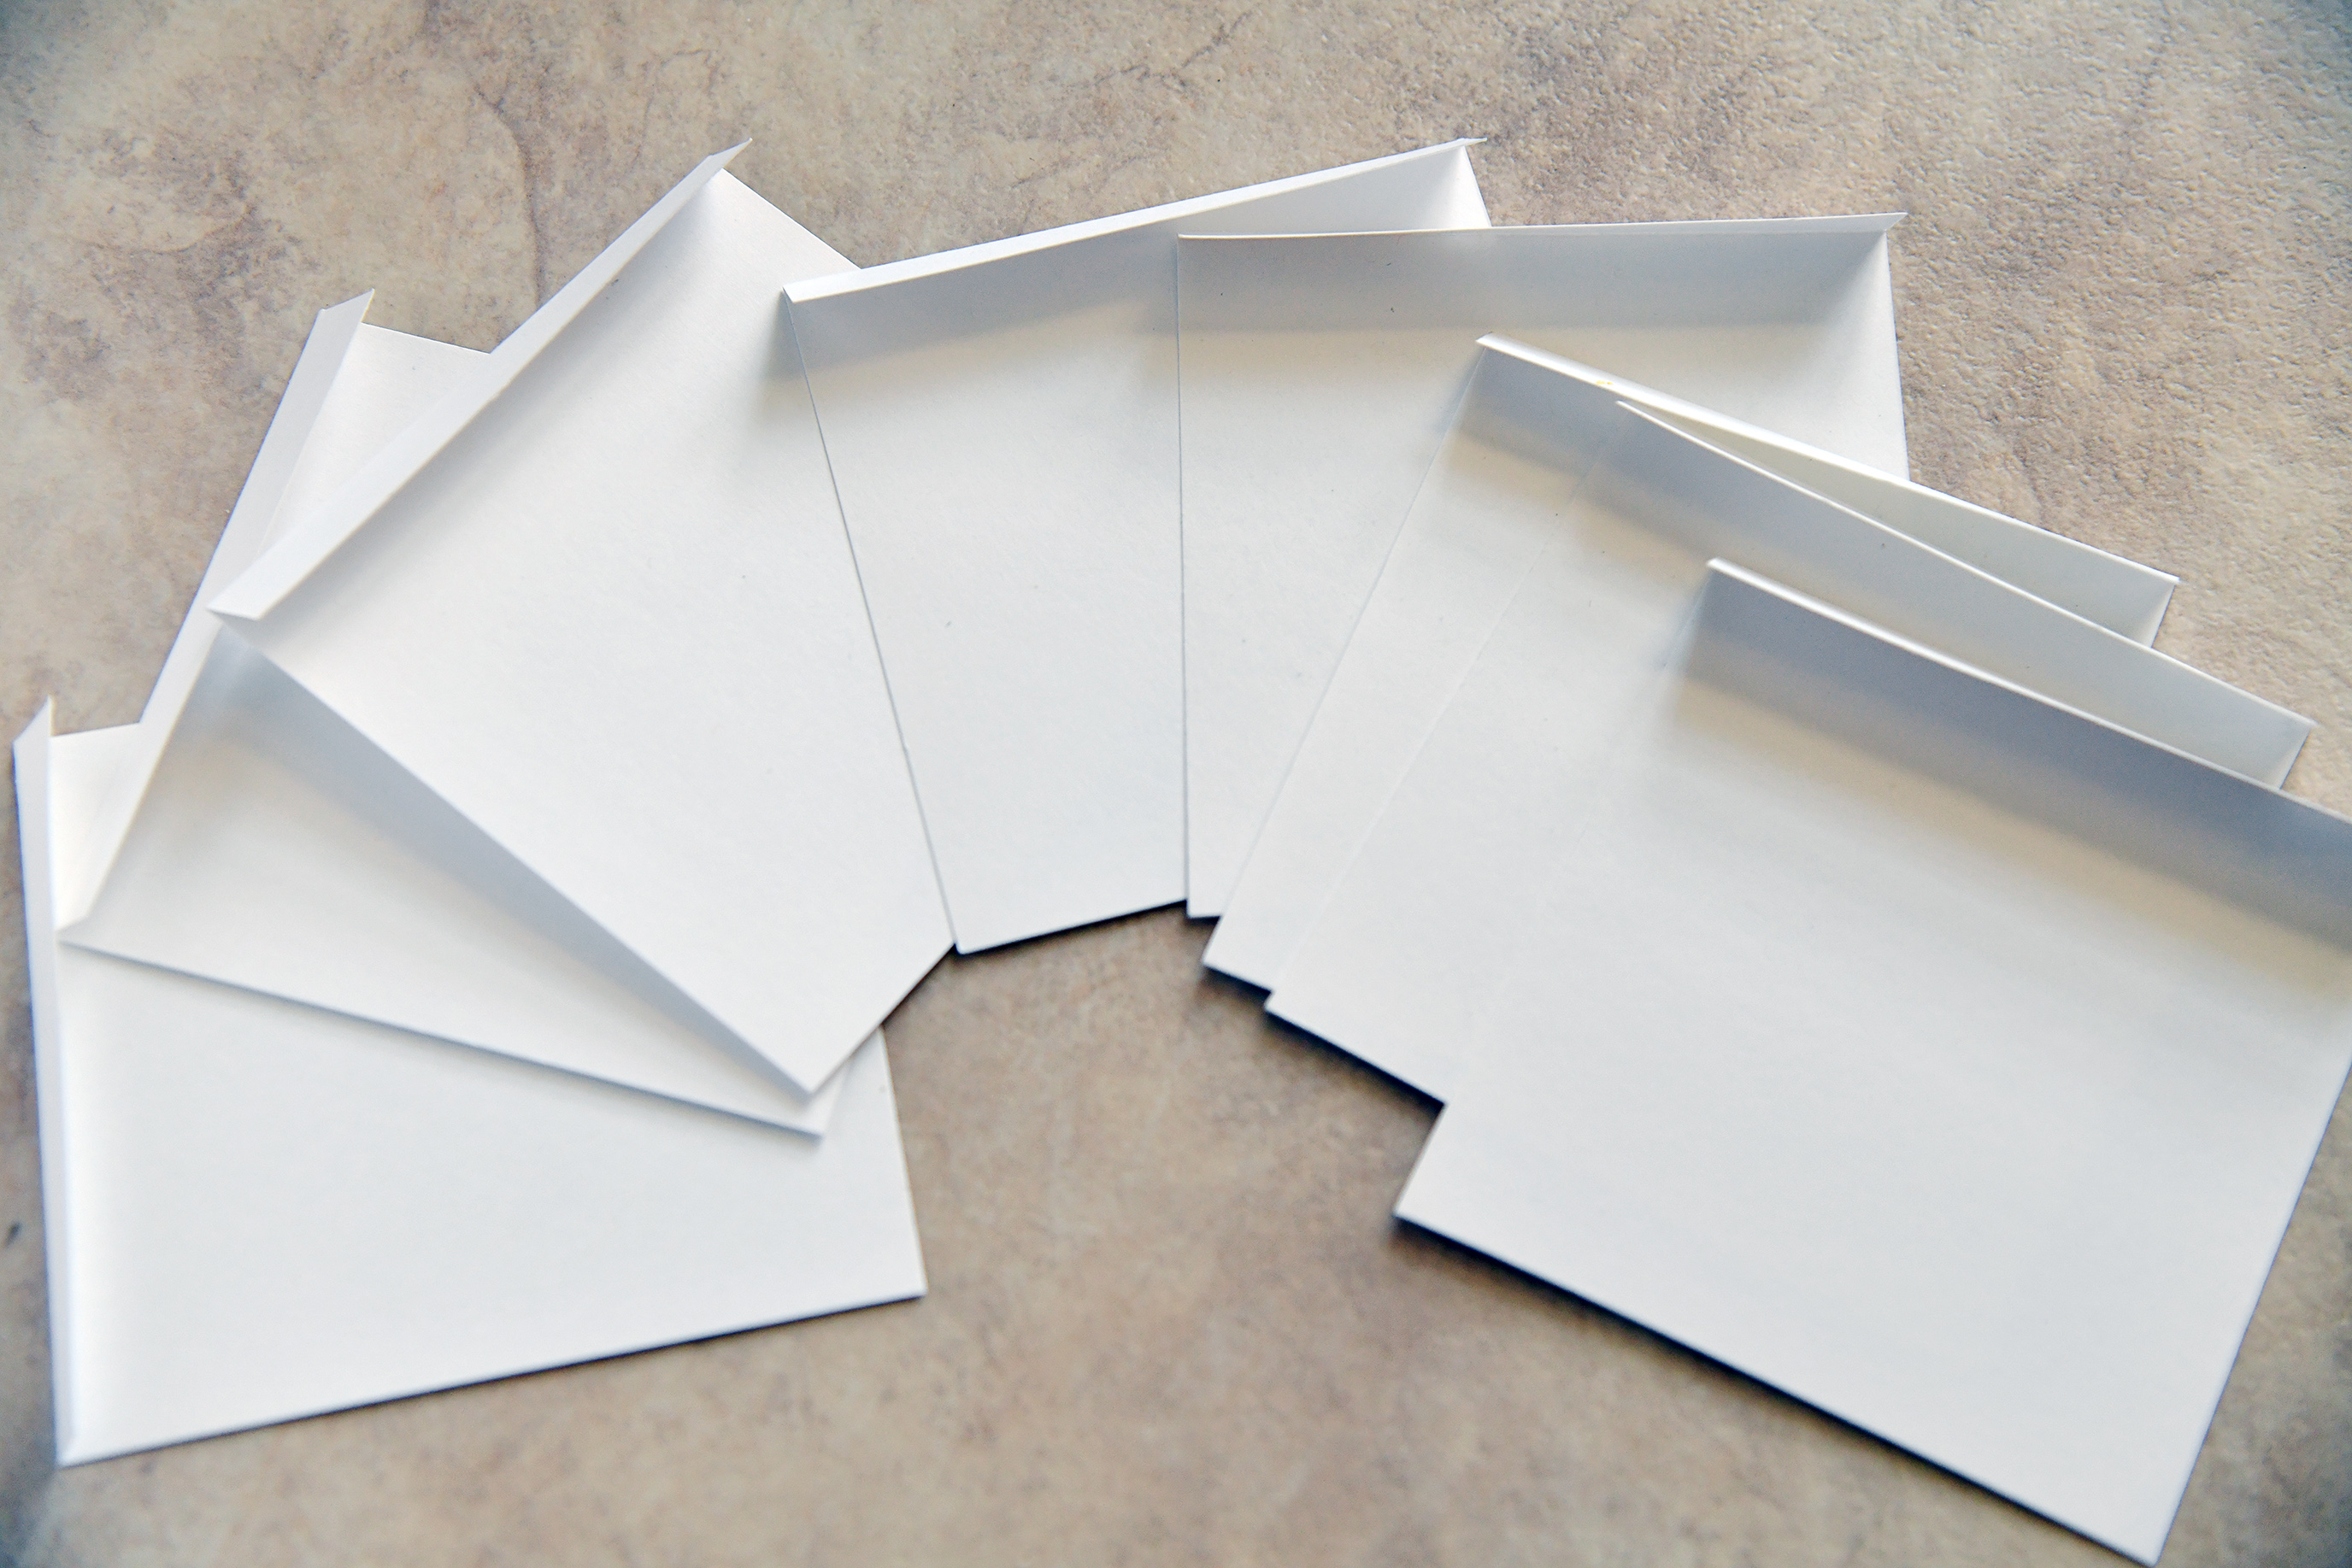
Fold at the score lines and burnish the creases. Fold over the right side, then the left. The left side should be placed over the right. You should have two 1/4 inch spines, left and right. This is the trifold Folio. There should be a 1/4 inch gap when folded over. This will allow for some bulk on the inside of the folio.

Take the 4 inch piece that you cut away, and cut it down to 8 inches. Then cut the 8 inch piece in half long ways, to create 2 8x2 inch pieces. These pieces will be adhered to the inside of the Folio on both ends to create 2 pockets. Make sure to only place glue on 3 sides and leave one side open for a pocket.


This shows how the 2 pieces are adhered to both sides of the folio. Leave inside ends open to form a pocket.

Using white cardstock, cut 8 pieces, 3 3/4 x 4 1/4.

Using a score board, score at 1/2 inch on the short side for all 8 pieces. Then fold over and burnish flat. I will refer to these pieces as "flaps".
Using patterned paper, cut 8 pieces 3 1/2 x 3 1/2. Adhere these pieces over the 8 "flaps." On the outside of the folded over flap, place a piece of 1/2 inch Score Tape or adhesive of your choice. These will be used to create the waterfall in the middle of the folio.

To create the waterfall, place the first flap in the middle section of the folio, about 1/4 inch of the way down from the top. To place the next flap, flip open the one you just adhered, and line the top of your flap to the edge of the flap you just adhered. Burnish. Do this for the rest of the flaps. You now have 8 flaps that flip up, then back down again. If you want, you could also create another 8 pieces for the backside of the flaps. The backs can be used for photos or journaling. You could place photos on the front pf your faps, then journal about that photo on the back.


Create tags that will fit into the inside left and right pocket folders. Or you could use those tuck spots for more photos.

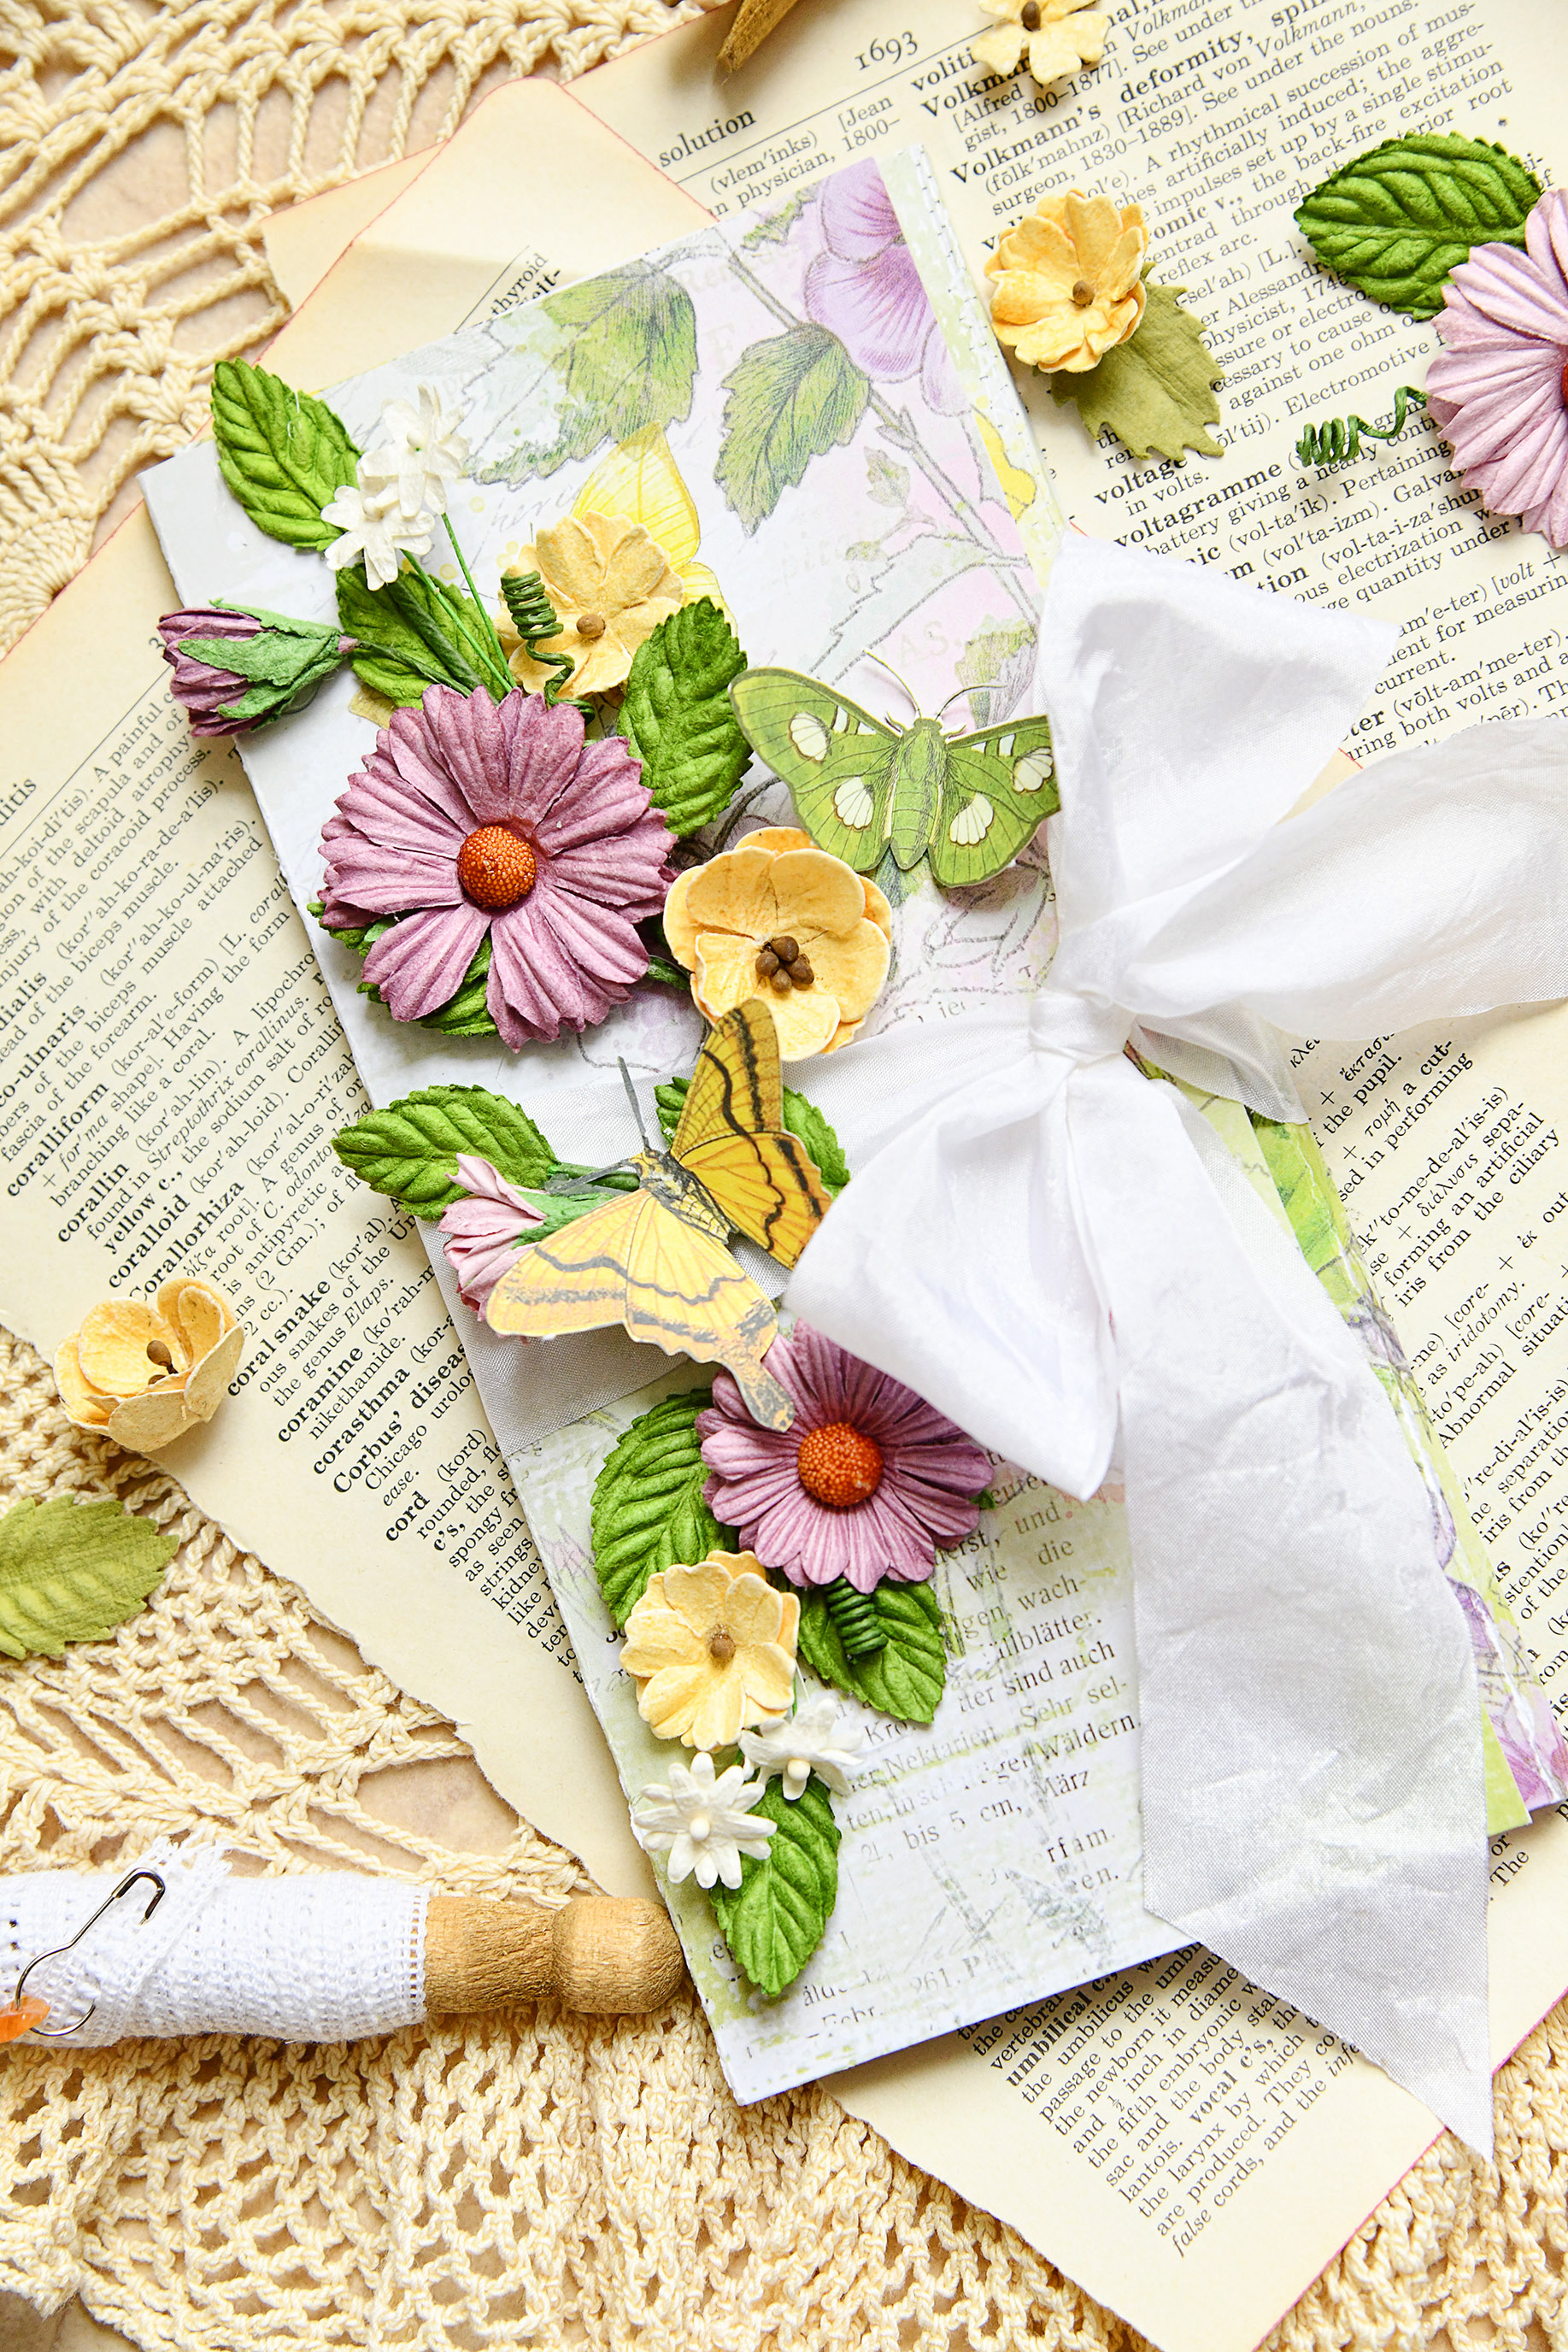
Laser cuts, Bubbles and Baubles, and flowers on this one.


49 and Market Products Used:
Vintage Artistry Collectors Edition Volume 2
Wishing Bubbles and Baubles Lilac
Sue here, just popping in to say that this folio is just lovely. The papers you chose and your instructions are clear so even I can make this, I call myself an advanced beginner :) Have a glorious day and thank you for sharing!
ReplyDeleteFabulous creations from this set!!
ReplyDelete