Thursday, December 31, 2015

The January kit from the Flying Unicorn and I am Guest Designer!!

http://www.flyingunicornstore.com

The January kit from the Flying Unicorn has a fresh pop of color to usher in the new year. Start your year on a fun and festive note. Without further adieu, we offer you our January "Your Passion. Your Art" kit of the month.


http://www.flyingunicornstore.com/category_s/1522.htm
January is a month to start a'fresh. This month, we have the perfect "Off the Page" piece to help keep everything around you fresh as well. Included in every main kit is this handy coaster set.


http://www.flyingunicornstore.com


From the beginner to the avid mixed media artist our Mixed Art add on kit will surely please you. Our Mixed Art kit will always come with a canvas and mixed media art supplies to advance your skills as an artist.


http://www.flyingunicornstore.com/category_s/1522.htm
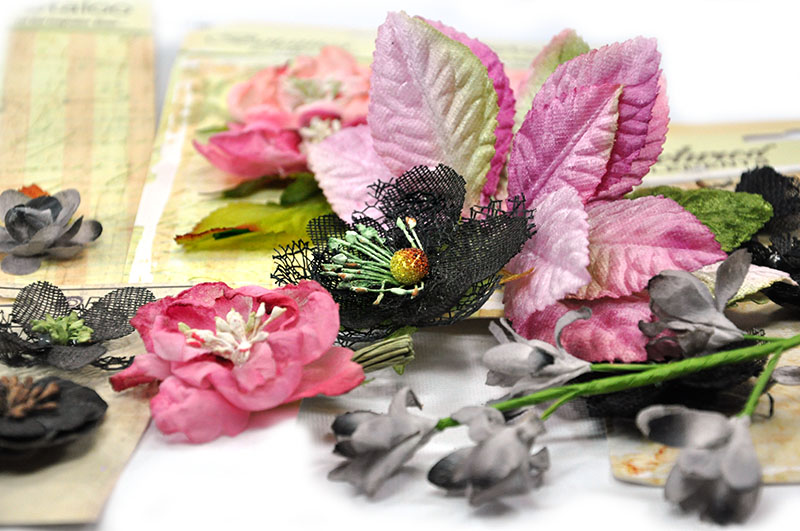
Flowers, vines,and embellishments oh my! Our Mixed Passion is a collection of everything pretty to add to the Main kit or the add on kits. The colors and embellishments will enhance your Kit of the Month creations or it can stand alone and you can create something magical on its own! So turn up the music, make some tea and lock your self away while you create some art!


http://www.flyingunicornstore.com

Our Small Art Big Passion is all about the love of making cards, tags atc's and anything in between. From Stamps, flowers, paper, embellishments and pretty things in between! These yummy goodies will enhance any of the kits or stand alone .


http://www.flyingunicornstore.com
We are thrilled to present great free tutorials, techniques, videos and Build a Page using our Kit of the Month to help you grow in the passion of your art. So stay tuned there is so much more to come in the next week!


Plan a day trip! Crops -Classes-Fun

926 North Monroe St
Tallahassee, Florida
Tel: 850.270.6366 Toll Free 800.231.7119 FREE

Thursday, December 10, 2015

Old World Style using Moon Shadow Mists

 Hello Lindy's Lovers!! Lisa here... I am coming to you with a extra project from me this month. I just cant get enough of Lindy's Stamp Gang Products. Today I will show you a couple of color techniques using Moon Shadow Mists, and how to achieve an antique feeling to your colors.
To prepare my Prima paper, I adhered it to a 12x12 piece of corrugated cardboard using Mod Podge. . I dry brushed it lightly using white gesso. I used a mask and some modeling paste to create some texture to my background. I prepared my die cut frames and painted them with gesso as well. I added white flowers to the design and  adhered them to my background paper. Once everything was dry, I brushed the entire surface with Gloss Gel, but you can also use clear gesso. This will give your paper a "bite" for the mists to  adhere to, without bleeding through the paper. It also allows you to blend your mists better with out them appearing muddy. Let the misting begin. I sprayed the entire page with Clam Bake Beige Starburst Spray.


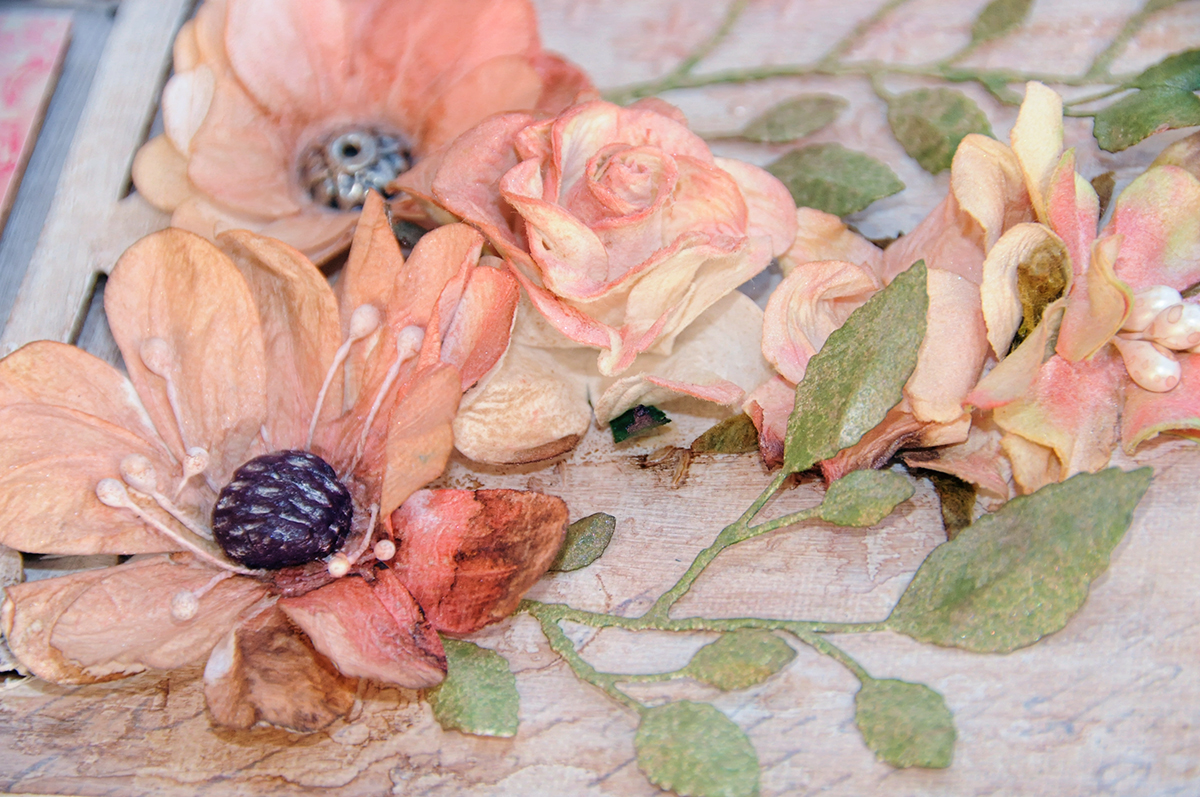
 All of the leaves were die cut from white card stock then sprayed first with Greased Lightening Green Flat Fabio Spray, then while still wet, just lightly sprayed them with Land Lubber Green Moon Shadow Mist. This gave them a more realistic color. The brown undertone is so lovely.


I sprayed the flowers with Wild Honeysuckle Coral Starburst Spray, but did not saturate them. While the mist was still wet , I very gently gave a light spray of Moonlit Mulberry Moon Shadow Mist to the flowers in random spots. This gave them an antique tea stained look. Once the flowers were all sprayed, I added my leafy vines and leaves. I just tucked them here and there.


I used a few tiny words to make up my title. Sometimes a few tiny words is all you need to make a big impact.


I love the way the color clings to the masked areas of the paper, giving them definition, and making them pop off the page.


I used a small brush and randomly brushed the Moonlit Mulberry Moonshadow Mist around the edges of the floral clusters and the frames, dabbing the colors a few times and layering more color. The color has a rosy undertone to it with the brown base. LOVE the Moonshadow Mists for that reason. And by dabbing a little, it gives the project the look of wax when rubbed off on furniture after it has been painted. The dark areas just cling to the crevices creating that antique look.


I wanted my floral clusters to appear as if they were hanging vines. You can see the closeups of the dabbed on Moon Shadow Mist, under and around the floral clusters. 


I have used this die cut frame a few times, but I simply love it!! It is actually 2 different die cuts that layer perfectly.  These frames were just primed with gesso and layered, then sprayed with Clambake Beige Starburst spray. I dabbed them in a few spots with Moonlit Mulberry Moon Shadow Mist. My sweet sweet grand daughter Charlotte completes this layout. Before I adhered the photo, I gave the entire layout one more light spray of the Clam Bake Beige Starburst Spray.


Thank you for joining me today. I hope that you give the Moon Shadow Mists a try. You will simply love the way the colors and the brown undertones blend to give you a gorgeous antiqued look. The color just sparkles right through giving it a beautiful sheen.

  xoxo
Lisa


Saturday, December 5, 2015

Frank Garcia Design Team Blog Hop!!


If you came here from  the very talented  Cari Fennells Blog, then you are on the right track!!  Welcome to the very first Frank Garcia Design Team Blog Hop!! This is a very exciting time for me, as I love everything that Frank has designed for Prima. I think I am not very good at Christmas layouts, but one look and feel of A Victorian Christmas and my hands just started creating!! This is the outcome. I wish you could see the glitter and sparkle in real life. Everything in this gorgeous collection is simply divine!


 The flowers are gorgeous!! With extra paper I had from cutting out the middle of my background paper, Le Sapin De Noel, I made some rolled roses and tucked them inbetween the flowers. 


Both corners use different flowers from a few packages of A Victorian Christmas Collection. My favorite are the green ones. I didn't even use leaves in my clusters because the green flowers were enough.


I edged the rolled roses using Color Bloom spray in Empress Gold. I also touched them with a bit of Diamond Stickles. 


I diecut the frame from corrugated cardboard and used the Color Bloom Spray in Empress Gold. Then I cut apart 1 piece of the Memory Hardware Cours Mirabeau Floral Lace , cut the one piece again into the individual tiny flowers and adhered them to the frame. Then I took the Memory Hardware Glass Pearls and adhered them over the little flowers creating my layered tint flowers. I placed that gold frame over another die cut that I covered with paper from A Victorian Christmas 6x6 paper pad to create dimension.

Here is a closeup or the frame. The glass pearls are gorgeous!!


I used the wonderful stickers from The Archivist Statement Stickers pad. So many words for so many different quotes and title you would like to create. I used the Gold Empress spray to color all of the exposed corrugated cardboard on my layout. I also used it  on all of the exposed edges of cardboard on each layer of  my matted photo.


Layering everything onto corrugated cardboard gives my layout loads of dimension. It also feels a bit rustic and vintage. I created 2 little scrolls from leftover paper, and tied them with twine. There are secret messages to my sweet little Charlotte.


Thank you so much for joining me today!!! Here is an awesome  giveaway!! Making an album would be so divine using these products from Franks new line.  Just follow the rules on Franks post to be eligible to win.


Now onto the next stop on the hop. Visit the very talented Beatriz Jennings Blog to see what she has created! 

Just in case you get lost along the way, this is the order of the blog hop. 

Wednesday, December 2, 2015

Saying Goodbye to Dusty Attic....

 This is an open letter to The Dusty Attic Family... 


As my contract has come to an end I just wanted to thank each and every one of you for all of the inspiration you have given me throughout my term...and always!!! Thank you for letting me into the DA family. I have enjoyed working along side old friends, I have made new friends, and will be following you all always. Jennifer Mahoney Hedger​, you are a super star business woman!! And I thank you for the opportunity you have given me on this team. I will always think of DA as the Empire of all chippie companies. Jen Burns​, your leadership was so appreciated. You are a doll. Thank you both for being so forgiving as I tended to flub quite a few times.  I really enjoyed my time with Dusty Attic, and just wanted to go out with a warm hug to all. I wish everyone a wonderful holiday filled with happiness, love and good health. May 2016 be your year to create the best you ever have!! I have been invited to join  the Frank Garcia DT featuring his products and designs for Prima Marketing, and I have been invited to stay another year with Lindy's Stamp Gang for 2016, I will also continue on the Heartfelt Creations Alumni DT... So thank you thank you thank you!! I will see you all out there in this big beautiful scrappy world!!!
                                                                 xoxoxoxoxo
                                                                       Lisa...