Monday, July 30, 2012

Zva Creative July DT Blog Hop! (and my Swirlydoos Round Robin Entry)


Zva Creative and our talented Design Team welcome you to our July blog hop!

The Blog Hop begins at Zva Creative's blog! Be sure head on over to check it out! Leave a comment there for a chance to win an extra prize package just for visiting the blog and telling us that you stopped by! You will also find a complete list of all the participating blogs there (in case there is a glitch along the way).  
If you made it here from  Susan Lui's Blog  then you are on the right track.

As you know, Zva offers many beautiful color groupings for pearls, flowers and crystals.  We want to make sure that they shine bright for you, so each designer was will be sharing a creation using a specific color or color combination on their blog hop project.  If you like what you see you can find a list of stores and online retailers that sell Zva HERE.

 This layout has a photo of my friend Tanya and her husband on their wedding day. I just love this fun pic. I also did this layout for the Round Robin Challenge at Swirlydoos. 
ZVA bling is the perfect accessory to any page or project!!There is a design and color for just about anything you need!! I chose pinks and greens for this layout.


 Flourishes- Pink/Rosy Crystal - [CR-05CB-105]


 Here is the list of product from Zva Creative that I used on this layout.

 2.5" Dual- Flowers - blue & Olive -[FL-04CA-129] is the large green flower.
 2.5" Dual- Flowers - White & Dusky Pink -[FL-04CA-128] is the large pink flower.
 sweet rose  1-3/8" or 35mm - Peach [FLBK-03CB-139] are the smaller peach roses.
 mini rose  -7/8" or 23 mm -Soft Blue [FLBK-03CB-130] are the small blue roses.
 mini rose -7/8" or 23 mm -Lime [FLBK-03CB-126] are the small green flowers.
 mini rose - 1/2" or 12mm - Pink [FLBK-03CB-102] are the small pink flowers.
 36pc leaves #I - 1.5" - [FL-04CA-111] are the leaves.


 Flourishes- Pink/Rosy Crystal - [CR-05CB-105] is the beautiful flourish I used here, I used only 1 of 2 that are in the package.


If you would like to play along with our design team, just follow along the blog path.  I am linking to one of the Zva designers and that designer is linking to the next and so on. Be prepared to be inspired along the way!
Hidden on FIVE of the designer's blogs is a Zva Creative prize package! Winners will be randomly chosen after the hop is over, so it's important to leave a comment on as many blogs as you can along the way.
The Blog Hop starts today, July 30th and runs through midnight US Eastern Standard Time on Tuesday, July 31st. 
The 5 winners will be announced on Wednesday, August 1st on Zva Creative's blog. We will do our best to notify each winner, but it's best if you can pop in to Zva's blog on Wednesday.

All you need to do is leave a comment on this Blog Hop post... you do not need to leave a comment on each and every designer's blog post to qualify. However, the more times you comment along the blog hop path, the more chances you will have to win.

We also thought it would be more fun to add even more chances to win our blog hop prize!  To increase your chances of winning:
* Comment to let us know that you posted on your Facebook page about our hop (link to any of the blog hop posts)
* Comment to let us know that you "tweeted" about our hop (link to any of the blog hop posts)
* Comment to let us know that you asked your local store to carry Zva creative products.  If they already do, that's fantastic, maybe you can suggest other products that they don't carry.
*Hop over to Zva's blog and leave a comment there to tell us that you made it there!

 The blog hop begins here at Zva Creative's blog. Your next stop is to the very talented Robin Shakoor's Blog
 Enjoy!

Thank you for joining us!

P.S. Mark your calendar to join us again on August 31st for our next Zva blog hop!


Sunday, July 29, 2012

Ustream Paper Bag Mini Album


Just did an impromtu Ustream Video on the bones of
making a paper bag mini album. Krissy, Rae and Frank are taking a class with Anna Dabrowska with Swirlydoos and Prima  in Chino, California. Had to do something for our peeps in Swirlyville!!
http://www.ustream.tv/recorded/24339188
My mini was inspired by Stephanie Miller. I will teach you how to do the bones of the mini and the next video will be of  the finished mini and more info on the pages. 

Thursday, July 26, 2012

Swirlydoos The Paper Doll Kit Mini

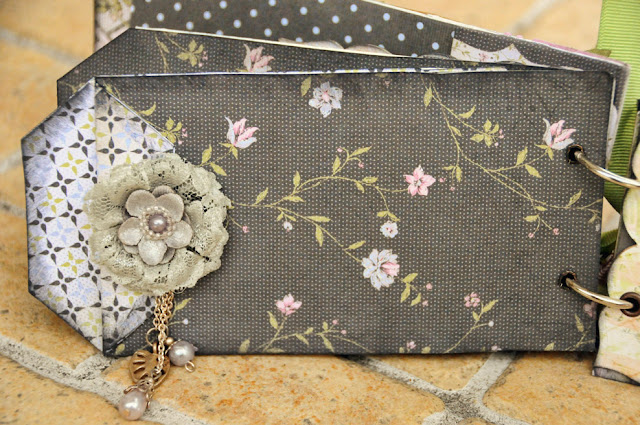
 I must warn you that this post is pretty Photo heavy. I watched a Live With Prima Show on Ustream where Stephanie Miller made a wonderful mini with Prima's new Zephyr line. I loved it. I had learned how to make the bones of the paper bag mini a couple of years ago from watching Stephanie do her thing on You Tube. She is an awesome mini maker!! Here is a mini I  created using Swirlydoos July Kit The Paper Doll . It isn't done yet as I would like to add more stuff to it besides the photo's. I told the girls on Swirlydoos that I would do a quickie Ustream Video on Sunday to learn how to make the base of this mini. So I will give you more details tomorrow with a list of what you will need to join us for a class. Thank You Stephanie for all of your wonderful inspiring creativity!!


Tuesday, July 24, 2012

CHA and a Class With Anna!!!

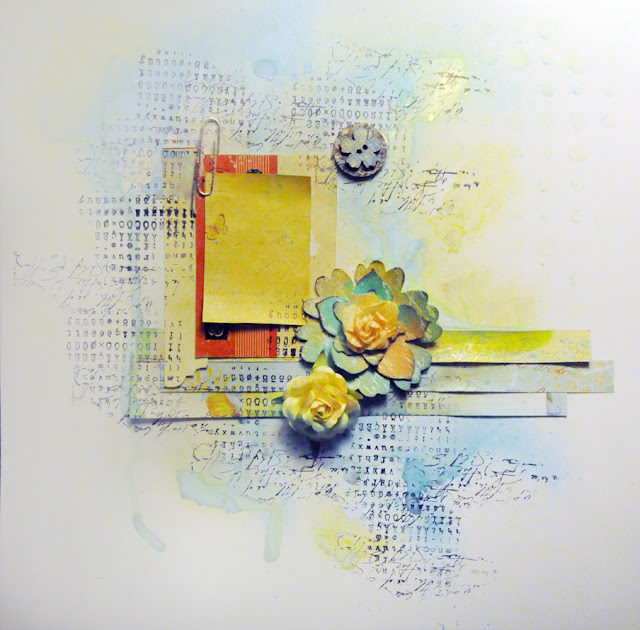
One of the high lights for me at CHA, (besides hanging with Krissy, Kim and Barbara) was to finally meet my good online friend Anna Dabrowska. And she even managed to sneak Kim and I in to do a Make and Take with her in the Prima Booth. It was one of the best Make and Takes at the whole show. For me anyway. Anna taught a layout using 1 sheet of white card stock, scraps from Primas Sun Kiss Collection, some flowers, wood buttons, a stamp and color sprays. Did it in less than 30 minutes. Here is my layout completed.


Here is a closeup of  the flower cluster.


This is a closeup of the photo mat.


I just fussy cut the sweet butterflies from the scrap pieces of paper. 


And here is the layout with adding the photo of Anna and I at the Prima booth after our wonderful class. she is an awesome teacher!!


Here is the photo of Anna and I closeup.


There were 5 of us at the class. It was amazing to see  how everyone's layout came out so differently. This is the one that Kim did. Isn't it beautiful!! We had so much fun!!


 And here is Kim and Anna after the class.


Here I leave you with 2 of the most incredible works by Anna. To see these 2 pieces  in real life was just amazing!! The woman is a real artist using mixed media at it's best!!


Saturday, July 21, 2012

Zva Creative featuring Swirlydoos kit "The Paper Doll"

 With Summer CHA behind us, I can now share 2 layouts that were debuted at CHA using new ZVA product. Can I say that I had a blast in Chicago hanging with Barbara, Kim and Krissy!!! And I got to meet a few great online friends, including Anna Dabrowska who I managed to do a class with and complete a layout (next post), and meet the wonderful owners of the Design Teams I am on!!! One being Carolyn, the owner of ZVA Creative. Oh my word, she is just the sweetest person you will ever meet!!! I loved her!! I got to talk to her a while, and totally enjoyed our conversation.


I clustered the Zva Creative flowers the large flower is  4.25" Flower w leaves - Hot Pink -[FL-04CA-103] ,peach color flowers are sweet rose  1-3/8" or 35mm - Peach [FLBK-03CB-139] , the little pink ones are, mini rose (144 stems) -11/16" or 19mm - Rosy Transition [FLBK-03CB-114] and the peach colored buds are,  Elegant Rose Buds (144 stems) 1/4w x 3/8h" or 6wx10h mm -Peach [FLBK-03CB-148]. The flower cluster is adorned by the gorgeous crystal flourishes which are from the new summer line. 
The smaller flourish shown here is Flourish - Pink/Rosy Crystal -[CRB-05CB-106] and it comes as a double pack.


This gorgeous flourish is,  Flourish - Pink/Rosy Crystal -[CRB-05CB-106] from the new summer line.


Another flower cluster using the same flowers as listed above, but with the addition of the sweet leaves 36pc leaves #I - 1.5" -[FL-04CA-111]. I curled the flower wires around a long thin paintbrush handle to form the tendrils. I tore the paper back on the sides, curled it under a bit and backed it with the left over paper packaging from the flowers and adhered  Dusty Attic bricks to it, then I spread some texture paste over the bricks to give it dimension.


Close up of the flowers.The smaller flourish is also from the new Zva Summer collection Flourishes- Pink/Rosy Crystal -[CR-05CB-105].


Another closeup of the flowers.


The chip board letters were from Swirlydoos current July kit "The Paper doll". I painted them a beige color then went over them with texture paste for a shabby look. The smaller letters were created as  a file in Photoshop, then I just cut them out and inked the edges and adhered them to the page. You can also see a bit of the brick stamp I used. It is the Layers Of Color brick stamp. 


This next layout was done with greens of the new ZVA summer collection.
My daughter has created her own path in life, so I found this quote on Pinterest. When she started at Le Cordon Bleu she wasn't sure which direction she was going, and the more she learned the more passionate she became about cooking and creating dishes. And now she is tearing the house down with her skills. One day she hopes to be a Culinary inspiration to others in the field.


The beautiful frosted flowers are, 3" Dual-Frosty Flowers - Olive & Kiwi - [FL-04CA-127], I paired them with. mini rose -7/8" or 23 mm -Lime[FLBK-03CB-126] and sweet rose 1-3/8" or 35mm - Olive [FLBK-03CB-138]. 


Here is a close up of the beautiful,  Flourish - Lime/Olive Crystal - [CRS-05CB-106]. They come 2 to a package.


The larger flourish is one of my new favorite. It is the Flourish - Lime/Olive Crystal [CRB-05CB-107]. 


Once again I created the tiny letters in Photoshop and cut them out then inked the edges and created my journaling spot.


The gorgeous corner chipboard piece is Dusty Attic. Swirlydoos opens special orders for Dusty Attic every once in a while. I painted it with Martha Stewart acrylic paint in a light green then went over it lightly in a darker green. I did some sewing around the photo. The circle in the back of the photo was created punching a circle with a corner punch. You can follow my video tutorial. Paper corner Punch Decorative Circles.