Thursday, May 28, 2015

"Cuddles" Dusty Attic Mood Board Inspiration Challenge

Hi there! I have  another layout using the gorgeous Dusty Attic chipboard. This time I tried to go simple, and create some white space, but I got a little carried away. I filled my white space with lots of texture. I absolutely love the Ivy Corners chipboard and wanted it to take center stage on the layout. To begin with, I mounted my Prima paper on a piece of 12x12 corrugated cardboard. I gave it a light coat of clear gesso. I used crackle texture paste with a Tim Holtz stencil, then used various colors of Lindys Stamp Gang sprays on the background once the texture was almost dry. The colors I used are Baby Blue Eyes, Caribbean Blue and Pirates Plunder Gold.
My daughters new puppy loves to snuggle. I love to snuggle him  back. I grabbed this shot with my webcam the other day when I was puppy sitting.


Before I colored my chipboard pieces, I treated them with a coat of Dusty in Colour Navajo White.
Once the paint dried, I used Lindys Stamp Gang Magicals in Aloha Avacado  to color the leaves, then dabbed  on some Caribbean Blue Starburst spray for a 2 toned effect. I love the intricate details in the trendils of the vines.


I sprayed the  Cuddles word from the Word Pack #11 set with one of the same colors I used on the background. 


This is just a closeup of the butterfly and flowers.


The butterfly is a Tim Holtz Stamp that I stamped, copied  and edited in Photoshop to get different sizes, then I cut out the different sizes. I colored them with Lindys Magicals. Magicals are gorgeous pigment powders that you can mix with any medium. I just used water to paint the butterflies. I used the Dusty in Colour Clear Crackle Varnish over the entire butterfly to give it the look of an old vintage brooch. I love the crackles!! There was a butterfly exchange over at Scraps Of Darkness/Scraps of Elegance , that my dear friend Lisa Novogrodski coordinated. I made some extra ones for myself!! These extras are what I used on my layout. I just didn't put the  jewels on these.


 I hope you get to join us for the Mood Board Challenge this month. It could be your chance to win some Dusty Attic goodies!! Please visit the Dusty Attic Blog to see more inspiration from the fabulous design team!!

Dusty Attic Products used: 

Dusty in Colour Clear Crackle Varnish DA0900  

 Dusty In Colour Navajo White

Word Pack #11 DA 1267
  
 Ivy Corners DA1018


Wednesday, May 27, 2015

Layout using BoBunny's Juliet Collection


Have you seen the Spring Preview of Bo Bunny's 3 new collections??? They are fabulous! I am featuring Juliet in this layout. It is elegant and romantic with vintage undertones.
To prepare my layout, I mounted the patterned paper on a 12x12 piece of corrugated cardboard using Mod Podge. Fter it was dried, I wet the edges with a spray bottle of water, then distressed them by peeling back the paper with the top layer of cardboard revealing the corrugated part.


 The photo mat was created by mounting a 6x6 paper and treating it the same way I did the background paper. Then I just layered the chipboard tag, a piece of Noteworthy, and created a little layered button that I tied around the Noteworthy using twine, then tied it in a bow. I also added a chipboard butterfly. Both the tag and butterfly were sprayed with Gold Glimmer Spray.


When the edges of the background are still wet, wrinkle, fold and crease the edges. It will dry this way. I added a bit of crackle texture paste to the edges and creases for texture. Some of the roses on the patterned paper were fussy cut, and some pieces of Noteworthy were placed under the floral cluster using foam dots for dimension.


The background was stenciled using Brocade and crackle texture paste. After it dried, I added some stamping, sprays and foil rub ons that I cut apart for added texture. The edges was sprayed using Gold Glimmer Spray.


The next few photos show the dimension created by layering.


I adhered the butterfly by the body only, then lifted the wings up a bit for dimension. The layered pieces were all edged with Gold Glimmer Spray.


The Blush Daisies were sprayed with Gold Glimmer Spray after they were adhered to the background.


I hope you were inspired to add a little shimmer of gold to your next project and check out the Bo Bunny Blog for more inspiration from the Design Team.


BoBunny Products:
Blossoms: Blush Daisy
12x12 Patterned Paper: Juliet,Verona/Juliet Collection
6x6 paper pad: Juliet
Stamps: Stitches, Flutter
Glimmer Spray:Gold Glimmer, Tutu Glimmer
Buttons: Juliet
Brads: Juliet
Laser Cut Chipboard:  Lace Laser Cut Chipboard Tags, Butterfly
Noteworthy: Juliet
 Doilies: 4 inch small
Stencils: Brocade
Filigree Foil Rub On: Gold


Sunday, May 24, 2015

So Happy Together***Bo Bunny*** featuring Wood Shapes

Hi there! I am up on the Bo Bunny Blog this holiday weekend! I'm here to show you that Bo Bunny's  wood shapes can be primed and sprayed to match your projects! I decided to mix and match some wood pieces from 3 different collections for my layout. I  love the colors of the sea. The blues and greens are just so calming. With just 2 beautiful colors you can create a masterpiece.On this layout I used BoBunny's Glimmer Spray in Frost and Mint.

Layout by Lisa Gregory featuring Forever Young

The background paper ForeverYoung Yum,was adhered to a piece of 12x12 corrugated cardboard using Mod Podge and a foam applicator. I then used the Brocade Stencil and Golden crackle paste on the background. Once it dried, I sprayed some Glimmer spray in Frost on a piece of plastic bag, then sprayed on a bit of water to water it down and pressed the bag, spray side down onto the background to achieve a watercolor effect. I did this using the Mint as well until I got the coverage I wanted. I also die cut the butterflies from the Flutter dies and sprayed them with Frost and Mint to get a variegated color.  Once they were dry, I adhered them to the background by the body only and slightly folded up the wings.

Layout by Lisa Gregory featuring Forever Young and stencils

For the blossoms, I enhanced the darker blue ones with Glimmer Spray in Frost. For the lighter blue flowers, I sprayed them with Mint to change the color up a bit. I also die cut some blossoms and leaves from the Double Dot paper in Clove, then I sprayed them with the Frost and Mint
Glimmer sprays for a 2 toned effect. They dry to a gorgeous shimmer.

Layout by Lisa Gregory featuring Forever Young and blossoms

The wooden pieces were all primed using white acrylic paint. Once they were dry, I sprayed them with Frost and Mint. I arranged all of the pieces on my layout until I was pleased with the design and then I adhered everything down permanently. I used the stamps around the page in random spots, just for texture.

Layout by Lisa Gregory featuring Forever Young and wood embellishments

I had the photobooth strip photo of me and my kids for years. I scanned it, and printed it out on photo paper. I cut it apart, matted them on Double Dot paper in Clove, and popped the individual photos off the page for a dimensional look.

Layout by Lisa Gregory featuring Forever Young and wood embellishments
  
These colors just make my heart sing!


Thank you for joining me today. I will be back soon when Bo Bunny will be showcasing projects with the newest Spring collections. Until then, get out those wooden pieces and give them some color!!

BoBunny Supplies:
12x12 Patterned Paper: Yum/Forever Young
Double Dot Paper: Clover Dot
Blossoms: Denim Blue Daisy
Wood Shapes: That's Life/Ironworks/Kraft Wood Keys and Butterflies
Dies: FlutterDies
Stencils: Brocade
Glimmer Spray: Frost/Mint
Stamps: It is Written/Distressed Textures
Ink Pad: Emerald
Layered Chipboard: Heritage
Double Dot Jewels: Emerald

Thursday, May 14, 2015

Lindys Stamp Gang*** Pocket Letter ***


I am up today on the Lindy's Stamp Gang Blog today. I am joining the Pocket Letter Craze and thought it was a perfect time to showcase the Lindys Embossing powers. Og course I used the sprays for my leaves and to touch up color on my flowers, I even sprayed the butterfly!!. It’s not new, but pocket letters are sure making their way around scrappers’ desks lately.They make for great swaps, and even “happy mail”! Who wouldn’t want one of these as a RAK? I know I would! This one will go to  special friend...In the hopes to give her wonderful Prima juju....lol
The papers I used for this Pocket Letter are from Prima. I used the 6x6 paper pad Romance Novel Collection.


On the front of my pocket letter I used some of my favorite Lindys spray colors. The leaves were die cut and sprayed with Lucky Shamrock Green Starburst Spray and then a bit of Ocean Breeze Blue was stroked on with a paint brush to highlight the blue in the spray. On the black butterfly, I sprayed on some Royal Peacock Fire Glitz Spray.


The seam binding was sprayed with Bells of Ireland Green Starburst spray. I didn’t want to soak it so that I would get a variegated look. I tied 2 pieces into each hole on the pocket page.


This is the back of the pocket letter and it’s where I used all of the embossing powders. On the wooden embellishments, I dabbed on a bit of white acrylic paint. Once dry, I heat embossed the colors onto the pieces. I picked the colors out from the papers to coordinate.


Here are a couple of closeups of the embossed pieces. If you look closely you can see some red flecks in each of the pieces. I did that just to add a little drama. I added some Razzleberry Plum embossing powder to each of the other colors. The pink butterfly is Geranium Coral Blush and the frame is Reindeer Moss Green.


The scissors  and the frame were embossed with  Scotch Broom Yellow.  All of the black pieces were embossed with Obviously Black. The corners of each of the pocket letter cards were stamped with a Prima corner stamp, and heat embossed with Obviously Black, Reindeer Moss Green and Razzleberry Plum.


I love the little wooden embellies from Prima. I used Stationers Desk for this project. They were primed with gesso, then heat embossed when dry.


This is the bottom row of the pocket letter. Every embellishment is from Prima.


This is the middle section of the Pocket Letter. I love that the 6x6 pad has very small pocket envelope that you can cut out and put together. They are perfect for writing little notes or keeping memories tucked away.


This is the top section of the Pocket Letter.


When folded up, these pocket letters fit perfectly into a regular #10 envelope. But if you have an Envelope Punch Board like I do, you can custom make one in the perfect size for your bulkier Pocket Letters.

Thanks for joining me today!! Don't forget to check out the Lindys Stamp Gang Color challenge!! 
You could win 1 of 5  $50.00 gifts certificates to the Lindys Store!! And check out the Blog for more Lindys inspiration. Join Lindys Mailing List. !  Sign up to get information about sales, inspirations, and updates delivered to your inbox. Follow us on Facebook...


Sunday, May 10, 2015

Mini Album featuring Elegance With BoBunny's Foil Rubons!

Hello everyone! BoBunny's  Garden Journal Collection is the perfect collection to create a mini album for the gardener, to display the wonders of a floral garden. The Gold Alphabet gives the album the old world richness of leather covered books embossed in gold. The Gold Alphabet rub-ons allowed me to create that look.  I absolutely LOVE them!!

    My project is a Gatefold Mini Album featuring the Alphabet Foil Gold Rubons and the Garden Journal collection. To create the base of the album, I followed a you tube tutorial by Ginger Ropp (My Sisters Scrapper ) It is her Sweet Day Mini Album Tutorial. The base is chip board covered with Kraft card stock. It was my canvas!!


 The  gold rub-ons are so rich that they look like gold leaf embedded in the paper. They are so easy to use and rub on with perfection. To enhance the gold, I created a jeweled closure using gold jewelry finds and seam binding, that were strung  through pink wide eyelets that were set in the cover. I also edged the album with Gold glitter paste.The glitter paste was easily applied using my fingers. Just dip your finger on the pot, and rub it onto your surface.


 I simply love to incorporate my jewelry finding into the closures and hanging dangles of my mini albums. It just lends a charm to them . The wide eyelets are from We R Memory Keepers.


 This is a side view of the album. I created one that was a little on the thick side as to fill the pages with dimensional embellies. I just love the way the glitter  paste sparkles
.

No garden is complete without butterflies. On the back of the album, I used modeling paste with the stencils doing floral corners and the 3 smallest butterflies down the middle.


On the inside of the album there are 6 large envelope/sleeve pages that each contain a journaling card that slips into the sleeve. On a few of the pages as in this one, there is a pocket on the sleeve itself that holds tags and additional cards. I used the Gold rub-ons to spell the word "flowers." The gold throughout the album is a little treat to add to the elegance. 


This is a closeup of one of the cards in the album that feature the Gold rub-ons. I created a few pull out tags. You can adhere photos to the back of the tags.
 

These are 2 of the 6 cards that were pulled from the sleeves. The lined pattern on the Delight paper was perfect  as you can use these cards to journal on. The opposite side of the cards have patterned paper and plenty of room for photos. They slide easily back into the sleeves. 


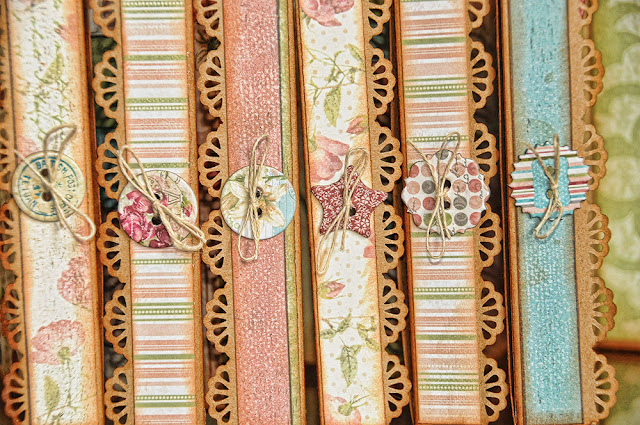
The top of each fold on the cards I placed a button. Once the button was adhered to the fold, I used my Cropodile to punch a holes over the existing holes and placed  a piece of string through and tied a bow. 


 Just a closeup of the buttons.I adhered the buttons to the flap, then punched a hole through the buttons and the flap using my Cropodile, then pulled some jute through and tied it into a bow.


These are the left and right sides with the slide cards still in the pockets. One side can be used for photos and the other side has the patterned paper that looks like fine stationary with lines that can be used for journaling.

Left side
 Right Side
As you can see it is chunky enough for filling with creative embellies if you choose. 


Thank you for joining me today. I hope that you are inspired to use the Foil rub-ons to add that special elegance to your next project. Please visit The Bo Bunny Blog for more inspiration from the designers, Tips, tricks and previews you wont want to miss!!

Lisa
xo

BoBunny Supplies:
Patterned Paper 12x12: Airy, Garden Journal, Bloom, Wonder, Stripe,Sketch, Gratitude, Journal, Delight /Garden Journal
6x6 Paper Pad: Garden Journal
Glitter Paste: Gold
Blossoms: Blush Pansy
Buttons: Garden Journal
Stickable Stencil: Love
Alphabet Foil Rub on: Gold
Chipboard: Garden Journal
Dies:Flutter