
 This Lo contains the flowers for my next tutorial. I call them Swirly Hibiscus. They are the same color as the ruffled hibiscus at our second home. I really need to go get cuttings and plant some in the home we are living at. They are double ruffle and gorgeous!! So I tried to duplicate them with paper.
 I cut the Prima bling apart.
 I enhanced the butterfly all over with Rock Candy Stickles and outlined it lightly with Icicle Stickles.
 I bunched one of the flowrs under the paper in the corner. I die cut the letters, Glimmer Misted them and covered with Glossy Accents for dimension.
 My bottom corner flower cluster. I used 3 different colors of Mist on the flowers. I will share that with you when I do the tutorial.
 This LO was fun to do. The flowers were made like my peeled poppies tutorial, but I didnt peel the paper. I used regular Bazzill card stock from the add on card stock kit. The frame is a Digital Element from Scrap Girls that I printed out and painted with Glimmer Mist. I traced the Dusty Attic piece with on the green cardstock from the add on Card Stock kit and inked it lightly for dimension. .
 Close up of flowers.

 I used my favorite Heartfelt Creations leaf stamp and painted with Glimmer mist as well
 We got the Prima mask in a past kit, so I used it along with Glimmer Mist to enhance the Kraft Paper in the card stock add on kit. I was not a fan of Kraft Paper but learned to love it by using Mists. stamps and stencils. Love the big Skeleton Leave in the kit. there were 2. This LO was my take on the sketch.
 Folded back a corner and placed the inked, punched corner piece and tucked a couple of flowers in there.
 I used the swirly vines that I provided Swirlydoos with a while back. there are so many colors you can down load, print and cut. I enhanced them with Stickles.
 A nice big package of Petaloo flowers in the add on flower kit went a long way. I still have a ton left.
 I did some button sewing on the frame. It just leaves a nice warm touch to your LO's.
 This Lo is of my sweet Willow. Such a love bug he is. He was laying on my cedar chest in a sun spot here. The new Prima printed paper reminded me of my Prima Build a Frame Stamp sets. so I busted them out along with my new Word stamp from Heartfelt creations and created the Prima Look a Like paper. i was so inspired to do this from the moment I saw the new Prima line. I Glimmer Misted the Cream card stock from the add on Card stock kit with the kits Sunkissed Peach Glimmer Mist. What a great color! I used a Crafters Workshop stencil (from a past kit) for some design. I really enjoyed creating the paper, and will be making more.
 I punch the scallops from a scrap of paper used in another LO, weaved some of my hand dyed Vintage Seam Binding through it and used a small piece of my Mays Art vine trim with some of the tiny Petaloo flowers. I just cut them in half and folded them.
 I inked the DA key, and colored my leaves.
 I created the title using my tutorial for Faux Scrabble Letters.
  I did some flowers using my Tim Holtz Alterations Tattered Flowers die, My personal favorite die. Used the coral card stock from the card stock add on kit, enhanced with Sunkissed Peach Glimmer Mist and inked the edges in soft black.
 I cut a circle into the paper, and hand tore some smaller sections and rolled them back to create the frame. I then took long strips of a different paper, used the same technique and tucked it around the outside of the inner circle. 2 layers seemed to work well.
 close up of the curled edges.
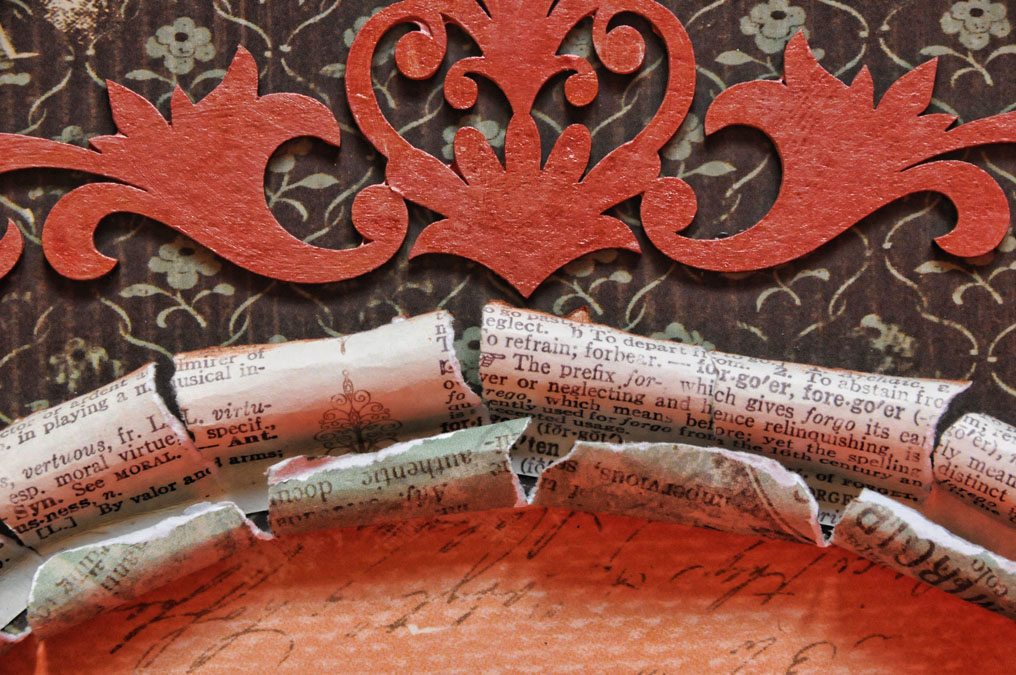 I used Lumiere paint for the Dusty Attic piece.
 I wove some of my hand dyed Vintage Seam Binding in a torn corner of the LO. I dyed it with the Sunkissed Peach Glimmer Mist.
 My flower cluster is made with kit and add on flower kit flowers.
 Close up of butterfly. I don't think the Glossy Accents on his body was dry yet...
 I really love the combo of blue and brown. The blue card stock is such a beautiful blue. I really enjoyed the color combo in this great kit!!
 More hand made flowers using the Tim Holtz Tattered Flowers die
 I hand dyed the vintage Seam Binding Ribbon with Glimmer Mist. I tied the ribbons onto the matted photo's of myself. The small leaves were punched with my fave Martha Stewart leaf punch. They work well with the smaller flowers.
 I love the way the seam binding shimmers. it has a great weave and texture.
 The Dusty Attic piece was left in the raw with only a small amount of inking.
 And last is the Recipe Box I create using the kit and add on flower kit. I found these great $1.00 recipe boxes at Michaels. I bought 4 of them and plan on altering all 4. This one is for my daughter. The only thing I will add are Timmy feet! I need to get to Hobby Lobby this week and pick up a couple of packs. The recipe box was inspired by one that my Scrapping friend Tammy did ..Go check out her gorgeous piece here!!
 This is the front.
 I printed out the poem and adhered it to the inside of the box lid.
 The top corner...
 The front closure...
 The top. I dipped the leaves and some flower in my melted Ultra Thick Distressing powder. This was Lisa Valentines Tutorial for Glass flowers, you must try it!! They are beautiful. Whether your own or store bought, they are fun to make.
 This is the box open. I love the ribbon that matches the paper.
 Another top view...
 And yet another.
Sorry for the long post, but I get so many requests to show every bit of my LO's and projects. I hope you enjoyed this ultra long post, cause I need to go to bed now...I'm fried...Nite Nite!!!
wow...absolutely amazing..EVERYTHING is so beautiful. Firstly...I cant wait to get stuck into my Swirlydoos feb kit and secondly i cannot wait to see your flower tutorial. They are just AMAZING!!!
ReplyDeleteAbsolutely gorgeous layouts!!! Love love love all your signature flowers ...with all their misty goodness:) I know how hard you must be working with a full census and it floors me how many gorgeous layouts and altered box you can make during this time. You must be the energizer bunny! Beautiful work Lisa:)
ReplyDeleteYou are such an inspiration. Your layouts are a dream and your flowers to die for. Thanks for sharing
ReplyDeleteAbsolutely incredible work! Thank you so much!...Nancy :o)
ReplyDeleteBeautiful work my inspirational friend:) I LOVE your recipe box!
ReplyDeleteI ordered this kit.
WOW! All of your projects are amazing and inspiring! Love your flowers, will definitely try the tut! So nice you scrapping your beautiful photos!
ReplyDeleteThey are stunning! Your work leaves me speechless...just love it! I can't wait to get my kit. I have been slacking off doing them but will definitely do it this month. Your photos of you are fabulous! Have a great weekend.
ReplyDeleteHugz, Z
they are all so amazing..and the kit is so gorgeous I LOVE IT!!!!!!! My favorite monthly kit so far. thanks for all the inspiration :)
ReplyDeleteIncredibly beautiful as always Lisa. :-) Can't wait to see some more of your flower tutorials. There's a little present for you on my blog. Have a great day!
ReplyDeleteStunning work!! As all ways.. Each and every piece is a true work of art. Keep the tutes coming on the flowers! I really can appreciate the hard work on those tutorials!! Got mine up now. :)
ReplyDeleteI am truely HONORED that I had inspired one of my favorite scrap artist on anything!!!! Thank you very much on giving me props on the box Lisa. You are the bomb girl!!
ReplyDeleteLisa these are amazing as always!! Love the lo with the curled paper..ur the Queen of punchwork and flowers girlie!!
ReplyDeleteLisa Wowsa... what a stunning post!! I love looking at your work & this post was awesome! I love your great details! I have missed not scrapping.. but now will have the time to start again & you have inspired me! thanks!!!
ReplyDeletetotally stunning pages I was wondering which punches you used for the pic frames on LO 3 I think it was the LO with the buttons
ReplyDelete