
To prepare my Prima paper, I adhered it to a 12x12 piece of corrugated cardboard using Mod Podge. . I dry brushed it lightly using white gesso. I used a mask and some modeling paste to create some texture to my background. I prepared my die cut frames and painted them with gesso as well. I added white flowers to the design and adhered them to my background paper. Once everything was dry, I brushed the entire surface with Gloss Gel, but you can also use clear gesso. This will give your paper a "bite" for the mists to adhere to, without bleeding through the paper. It also allows you to blend your mists better with out them appearing muddy. Let the misting begin. I sprayed the entire page with Clam Bake Beige Starburst Spray.

All of the leaves were die cut from white card stock then sprayed first with Greased Lightening Green Flat Fabio Spray, then while still wet, just lightly sprayed them with Land Lubber Green Moon Shadow Mist. This gave them a more realistic color. The brown undertone is so lovely.

I sprayed the flowers with Wild Honeysuckle Coral Starburst Spray, but did not saturate them. While the mist was still wet , I very gently gave a light spray of Moonlit Mulberry Moon Shadow Mist to the flowers in random spots. This gave them an antique tea stained look. Once the flowers were all sprayed, I added my leafy vines and leaves. I just tucked them here and there.

I used a few tiny words to make up my title. Sometimes a few tiny words is all you need to make a big impact.

I love the way the color clings to the masked areas of the paper, giving them definition, and making them pop off the page.

I used a small brush and randomly brushed the Moonlit Mulberry Moonshadow Mist around the edges of the floral clusters and the frames, dabbing the colors a few times and layering more color. The color has a rosy undertone to it with the brown base. LOVE the Moonshadow Mists for that reason. And by dabbing a little, it gives the project the look of wax when rubbed off on furniture after it has been painted. The dark areas just cling to the crevices creating that antique look.
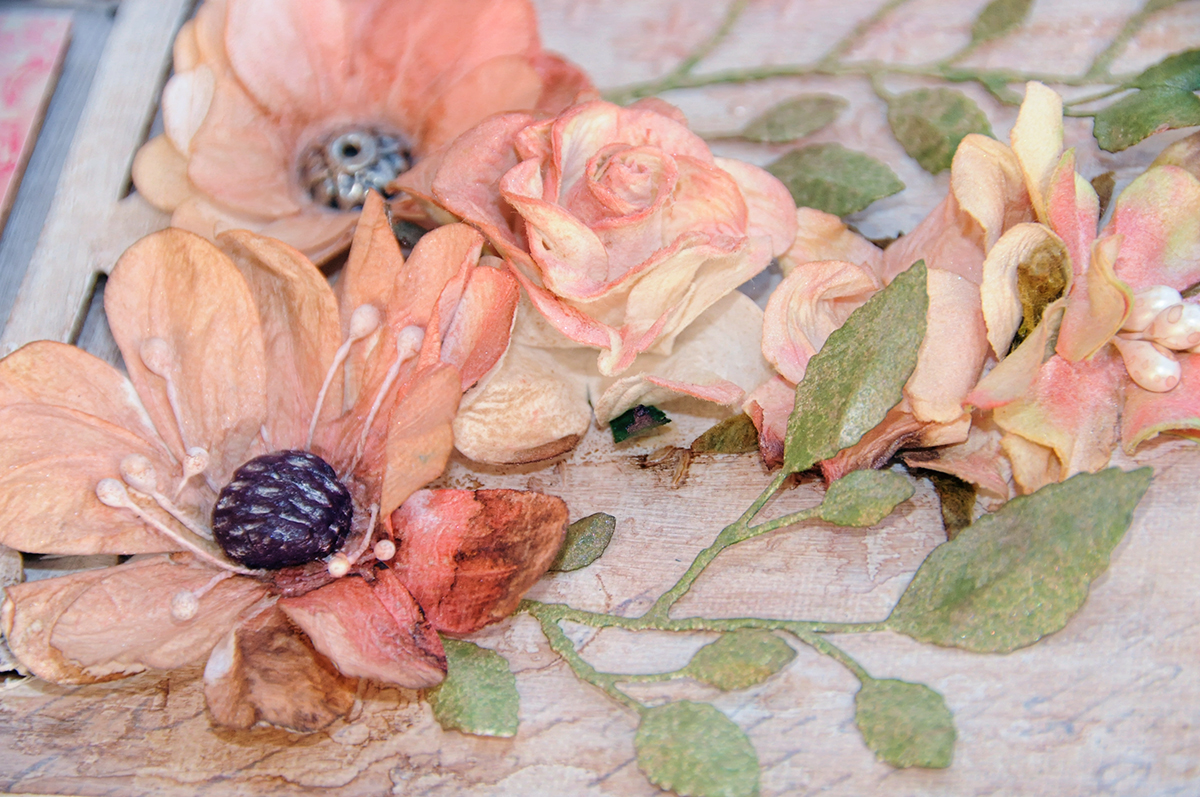
I wanted my floral clusters to appear as if they were hanging vines. You can see the closeups of the dabbed on Moon Shadow Mist, under and around the floral clusters.

I have used this die cut frame a few times, but I simply love it!! It is actually 2 different die cuts that layer perfectly. These frames were just primed with gesso and layered, then sprayed with Clambake Beige Starburst spray. I dabbed them in a few spots with Moonlit Mulberry Moon Shadow Mist. My sweet sweet grand daughter Charlotte completes this layout. Before I adhered the photo, I gave the entire layout one more light spray of the Clam Bake Beige Starburst Spray.

Thank you for joining me today. I hope that you give the Moon Shadow Mists a try. You will simply love the way the colors and the brown undertones blend to give you a gorgeous antiqued look. The color just sparkles right through giving it a beautiful sheen.
xoxo
Lisa

Lisa,
ReplyDeleteA most beautiful and elegant page! And, Ms. Charlotte is looking quite gorgeous!! Thank you for sharing the tips on the Moon Shadow Mists. I have several, but never have used them - but I like the end result you achieved.
Soo beautiful!
ReplyDeleteStunning page!
ReplyDeleteLovely...
ReplyDelete