

I used the Prima Build a Frame Stamps to dress up the yellow car stock and create my own paper. Love the big butterfly paper...
 I created the flowers from scraps of paper in the kit. Used my Tim Holtz Tattered Flowers die, and my McGill Starburst punch for the stamen and dotted the small circles with the liquid pearls in Cantelope from the add on embellishment kit. Then used the beautiful blue jeweled vintage brads for the centers.
 I wrote the journaling using a Zig pen and did some machine sewing around the paper.
 I used a Sizzix die for the little flourishes and clustered the flowers.
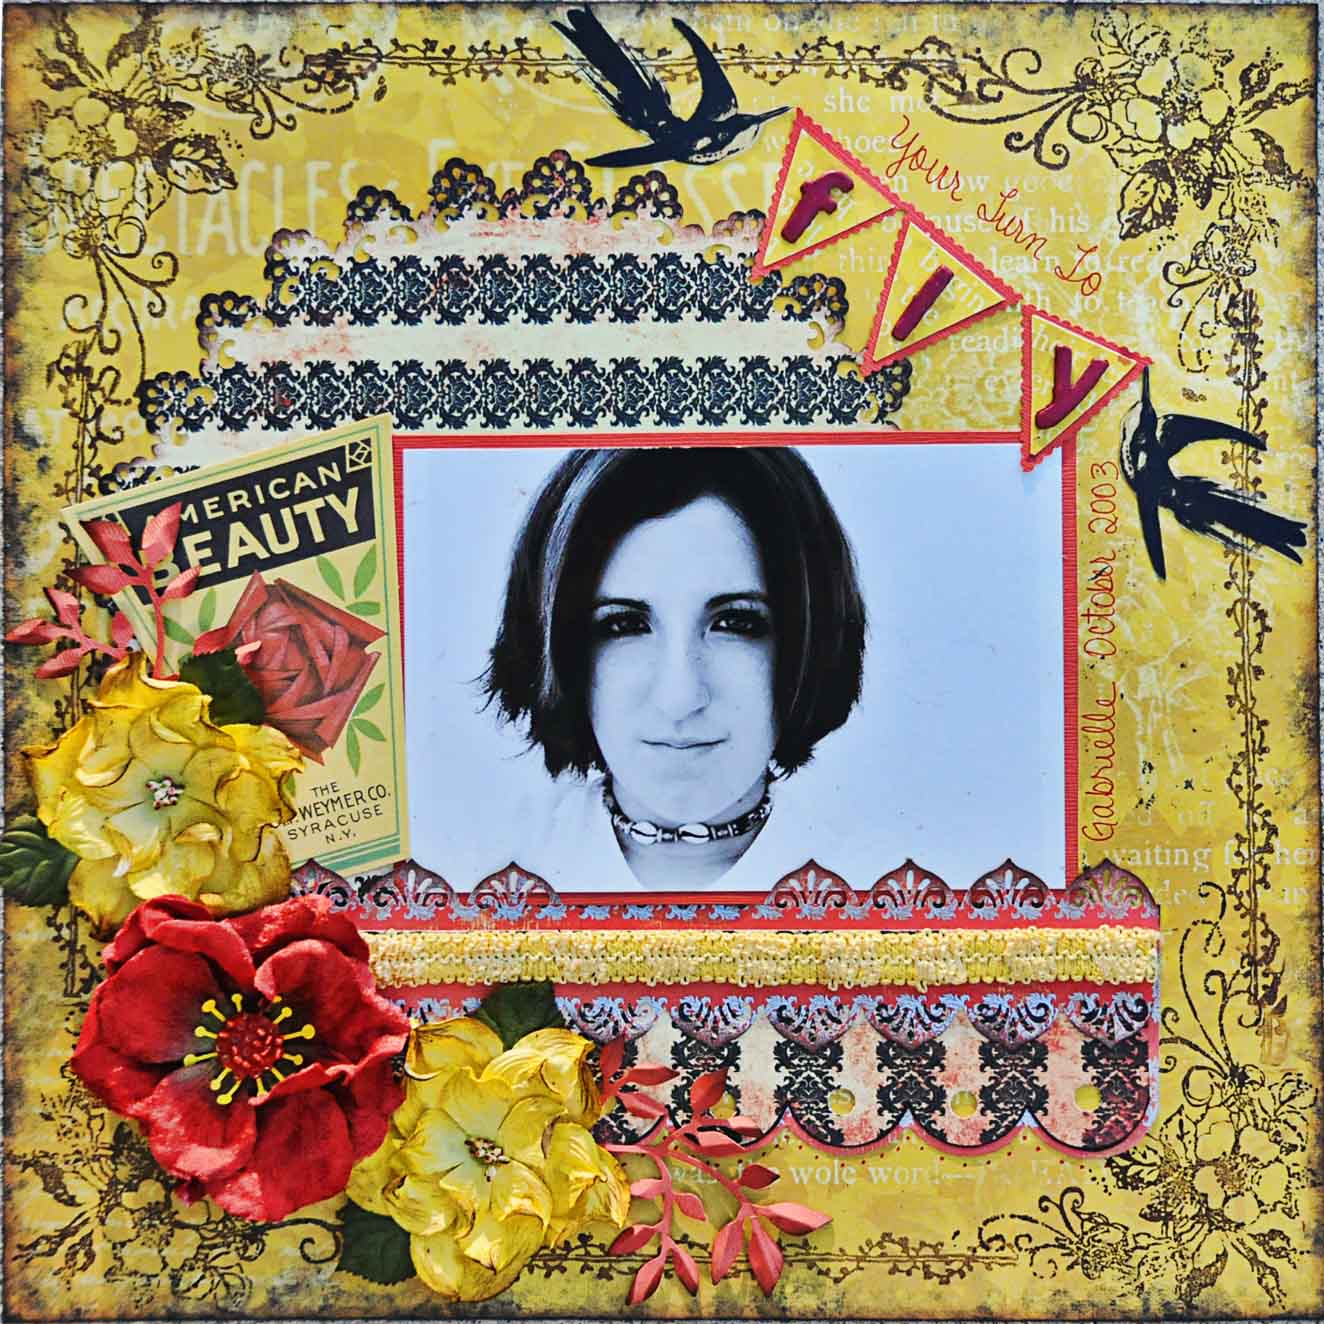 I am not a fan of banners, but had to try one for this LO. I think I really like them now..hehe.The photo is Gabrielle at 13 years old. Once again I stamped the paper with my Prima Build a Frame stamps. I also changed the middle of the Petaloos flower and inked the yellow flowers a bit. Both are from the flowers add on kit. I uses the corner punch decorative circles technique I created for the circle and cut out the little acetate birds to fly the banner.
 Just a closeup of the flowers. The trim in the kit is also very beautiful.
 Closeup of stamping and punched circle.
 Closeup of the sweet banner. I cut out and matted the cut triangles then used my tiny scallop deco scissors to trim them. I painted the letters in the kit with Lumiere paint and adhered to the triangles.
 Closeup of the flower cluster. The tiny leaves are a Sizzix Sizzlets set cut from the add on cardstock.
 There was a time when Gabrielle was into shopping at Hot Topic for her clothes. Drove me nuts, but it was a passing fade, thank goodness. That same year she created her own Halloween costume from an old black dress she had. She ripped and gathered and sewed. She added tulle and red ribbon and tied a big fat red satin sash around the waist. I was impressed. I played with the photo in Photoshop, added a texture layer, and brushed on some dark wings to give it a Gothic feel.
 I used the Prima mask and some black chalk ink. I cut out the vines which you can find at Swirlydoos in all sorts of colors. The cut the smaller blooms in half and folded them to make the buds.
 Cut and layered more flowers and ripped the paper then used Embroidery floss to sew it back together. Altering it the same way Gabbie altered her sweet party dress.
 This is my Configuration box. I decided to do a sew theme, since that is another one of my passionate hobbies.
 I dressed the spool with ribbon, a beautiful button. The pin as well as the ribbon came from Zandra.
 I thought I had little scrabble tiles, but they were to big, so I created my own in a smaller version. Love the way they came out. I photocopied the tiles, cut them out, backed them with chip board and accented them with Glossy Accents to give them sheen. Then I created a hidden stand in back of each letter to stand the letters at an angle,just like on a scrabble stand. They look like wood. But are just pictures of the tiles. I think I will be using this technique more often. Look for a tutorial this week on step by step instructions. I will even provide files of the alphabet tiles for you.
 The big beautiful button came from my Grandmas button box that she gave me years ago. It really is a beautiful piece. The tiny doily was made by my Aunt years ago. I have kept 10 of them for soooo long. This was the perfect project to use the smallest one. The paper rose is Prima.
 The sewing machine is part of a collection I have of miniature sewing machines. It is even imprinted with the Singer name in gold. Just like my real vintage Singer.I had the tape ribbon in my stash forever as well.
 I just stuffed in one of my organza flowers that I made months ago when I did the tutorial on them. I may have to recreate the tutorial as it got lost in Cyber space when the original Swirlydoos site was hacked...
 The ribbon and the beautiful bobby pin is also from Zandra.I glued the tiny button on it. And I glued a button on the wooden spool as well.
 I poured some tiny buttons in the bottle that came in the kit and tied a ribbon on its rim. Added some more ribbon Zandra sent me and placed a corsage pin through it to hold it on the spool. Just tucked a little May Arts Vine Ribbon in the box.
 The flower also came from Zandra, and the silver bobbin is from my grandmas old Singer sewing machine and I just topped it with a tiny ribbon bud.
 The cameo was from a Swirlydoos past kit that I didn't get to use on a layout.
 I couldn't help but to add some Timmy Feet!!! They just added all the elegance the box needed.
 And of course the Timmy corners finished off the top. I hope you enjoyed the journey through my box as much as I enjoyed creating it!! If you have created one, leave a comment with a link. I would love to see it!! Swirlydoos has the most beautiful Tech Projects each month. You will learn to create outside of the box!! Or inside in this case!! lol. And as T!M always says...When creating, Just enjoy the journey...I know I do!!
This comment has been removed by the author.
ReplyDeleteAbsolutely beautiful! I love the Configuration box.
ReplyDeleteAbsolutely gorgeous layouts! So many neat techniques to try out. Thanks for the inspiration!
ReplyDeleteO...M...G!!! how amazing are those.. love the configuration box.. I'll send you my address so you can send it to me..LOL The layouts are stunning as usuall.. I'd love to have just a drop of your talent!!
ReplyDeleteHugs
Nanné
P.S Have a wonderfully creative New Year..
OMGosh Lisa!! I'm totally speechless..I LOVE the box...have to get me one of those! You've done an amazing job on it..and ur lo's are nothing short of just fab!!! Let me know when u put up those Scrabble tiles...what an AWESOME idea. Keep up the Swirly goodness girl!!
ReplyDeleteGorgeous...cant wait to get my kit :) Happy New Year Lisa
ReplyDeleteLisa~The layouts you created with the new kit are Fabulous! Love all your flowers, stampwork..and punchwork!
ReplyDeleteBeautiful colors and inking.
ReplyDeleteLisa all your layouts are beautiful! The box is awesome!!!! It looks like a treasured antique! I love it! xo
ReplyDeleteWonderful job on all of these! Great photos and gab use of the bright colors. And who wouldn't love your config box??!!
ReplyDeleteGorgeous layouts, and the configuration box is just amazing.
ReplyDeleteYour LO's with the January kit are gorgeous and that configuration box is amazing!
ReplyDeleteWOOW! What a configuration box!!! Love it!! :)
ReplyDeletewonderfull.
ReplyDeleteyou can see one of my config.boxes overhere:
http://eennieuwestart.wordpress.com/2013/06/28/configuration-box-by-tim-holtsz/