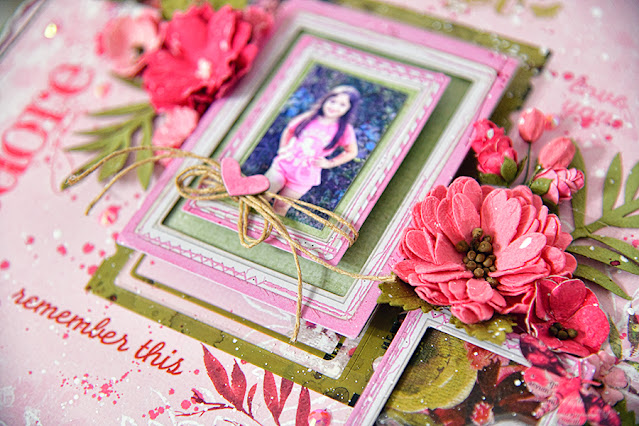
Hello Lovelies. Valentines has passed, but this is still the month of LOVE. So, to fit the mood, I created a layout using the new gorgeous ARToptions Rouge, I love pink!! And what better color to pair it with, than hues of green. The main design paper I used is Rouge, Sweet Nothings. The green paper underneath is from the fabulous Rouge Color Foundations collection. #4. I use to fret about finding the perfect colored cardstock to compliment my projects, and now we have Foundations!! Perfectly coordinated. I cut a 1 inch border from the #4 paper, and saved the inner cutout for something else. I can't see wasting it behind the main paper. I cut 1/4 inch around the Sweet Nothings paper, and machine stitched around it. I then distressed the edges all around the outside the stitching. This created my base to build my design.
Thursday, February 16, 2023
49 and Market ARToptions Rouge
Here, I used the jute to tie around the framed photo. Once the bow was tied, I adhered a tiny chipboard heart to the middle of the bow. I stacked the frames, starting with ARToptions Rouge, Filmstrip frames. There are many sizes in the pack. I adhered a bigger one to the background, then began to build the layers. I used 2 of the frames from the Color Swatch Blossom Frame Set. I backed both of the frames with the leftover piece of #4 Rouge Foundations paper. Using the Single Ply Jute, I tied 2 pieces around the photo. I used corrugated cardboard between each layer for height. I slipped the photo under the jute and onto the frame. I love these frames as the stitching looks so real! They are so sweet!
I used 2 more smaller frames and backed each one with the Rouge Fabric tape. I used the wide roll in the pack. They look like 2 framed little master pieces of art. I then built my floral design using the Color Swatch Blossom - Acetate Leaves and a few of the flower collections in pink tones. Garden Petals, Royal Spray, and Royal Posies. I used a couple of ARToptions Rouge Laser cut butterflies to tuck in the flower clusters.
The 12x12 Rouge Sentiments Rub-Ons are simply fabulous. I chose 4 different sentiments to scatter over the layout. I tucked some Rouge Laser Cuts into my floral clusters as well. I spattered some white acrylic paint, and some coordinated colored ink to finish the layout. I added some pink colored rhinestones from my own stash for bit of sparkle.
I hope that you are inspired to create something with ARToptions Rouge. It really is a beautiful collection. Until next time, Happy Creating!! xo
Wednesday, February 1, 2023
49 and Market Vintage Artistry Tranquility
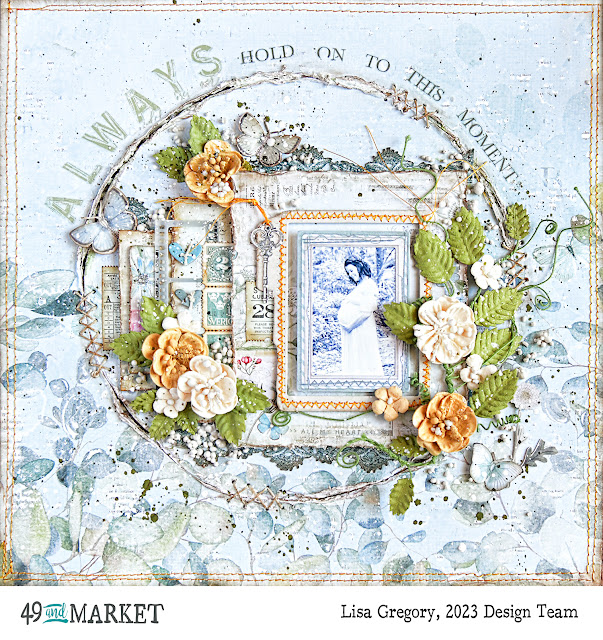
Hello Lovelies. Today I am sharing with you a layout done with Color Swatch Eucalyptus and Vintage Artistry Tranquility. There is so much to these collections. The possibilities to create are endless! You have to see the amount of ephemera that goes with the collections. Besides the papers, the embellishments are gorgeous!. I chose to start off with a 12x12 layout. To start, I adhered my paper to a piece of 12x12corrugated cardboard. I use Mod Podge because I like the way it comes away from the paper if you wet it. It makes it perfect, to distress our paper after it has been already mounted. After the paper dried onto the cardboard, I took a small glass plate, placed it on the paper, and using a scalpel (hey, I'm a nurse!) I cut/scored into the layer of paper all around. Using my finger dipped in water, I wet the cut lines, and tore back the paper a little revealing just a very small part pf the cardboard. There were spots where I didn't tear back the paper, and I used the single ply jute, to sew X's stitches, as if I were holding the paper together with stitches. I used some white gesso with touched of green into the slit parts of the cardboard. This was my base for the layout.
I created a vine using the Sugar Posey Flowers in Butterscotch. I had some floral wire, and created the vine with the flowers, leaves, and floral wire. The size of the sugar Posies was perfect for my piece.
The 49 and Market Rub-Ons glide on your paper like butter!! And the beauty is they do NOT leave a glare or a border the way old rub ons use to. I used the 12x12 Vintage Artistry Tranquility Sentiments Rub-on transfers. I used the word ALWAYS, and cut the individual letters apart to make it easier to follow the design of the curves on the circle. I did the same with the smaller words.
I love layers. For the photo mat, I cut apart a piece of paper from the Tranquility 6x8 papers. But hold on to the cut away scraps! I used those for parts of the papers in the layering in graduated sizes, using corrugated cardboard and chip board between layers. I love dimension in my layouts. No paper is every pasted on my watch! I layered a Essentials 4x6 File Frames in the middle of my mat. I did a l little machine sewing on the frame before I adhered it to the mat. I distressed and inked the edge of the mat. I then used the scraps of the 6x8 paper, cut it down, distressed and inked the edges. In-between the pieces, I added tickets and an Essential Filmstrip in Eucalyptus. I added string the laser cut key, and I poked holes in the chipboard hearts and tied some single ply jute through the holes. To frame the photo, I used a smaller frame from the Eucalyptus Frame Set.
Here you can see the dimension between the layers. The entire middle part of the layout is lifted off of the page. Of course you can leave the cardboard out from in between each layer. But I like it.
Thank you for joining me today. I hope you are inspired to start a project this week using the new Eucalyptus and the Vintage Artistry Serenity. I concentrated on the blues and green in the collection, but there is a lot of pink that I didn't use. Next time!!!
49 and Market Products Used:


