Friday, December 31, 2021

December 2021 Heartfelt Creations Alumni Blog hop

 The last Hop of the year. But wait...2022 is going to bring you so much more Heartfelt Creations Inspiration! 


Todays hop begins at 
8AM EST on Friday, December 31, 2021 and runs until 11:55PM EST on Monday, January 3rd, 2022. Leave some love to each of the designers blogs for a chance to win a $25 Heartfelt Creations Gift Card. Heartfelt Creations is also giving away a second $25 gift card for a randomly chosen comment from their blog. The winners will be announced on the Heartfelt Creations blog and Facebook page on ***Wednesday, January 3, 2022. ***So check there on the Wednesday following the hop. The winner has 72 hours to claim the prize by emailing socialmedia@heartfeltcreations.com. Please write “Winner of the December 2021 Alumni Hop” in the subject line.

Today I bring to you a folio style card that can be used for just about any occasion. It measures 4x6 with a 1/2 inch spine. The base is chip board and I covered it using the Climbing Clematis Collection Paper Collection. If you are pressed for time, the collection has 2 sheets with the flowers and leaves  printed, so all you have to do is die cut them and embellish as you wish. 


To adorn my cover, I used the 3D mold to shape the flowers, and added some of Rajni Chawlas Crystal Clear to the petals, and Flower Soft to enhance the yellow in the middle. So simple, and they came out so elegant! I printed up the sentiment and cut it apart, using only some of the words to create a new sentiment. I adhered  the words on a cut out label from the collection, and popped it up on some pop dots for dimension. I fussy cut the sweet little birds and adhered them to the label as well. 


I used sari ribbon for the spine of the folio, and tied it in a bow. On the back cover, I adhered a die cut flower and some of the leaves to the upper corner. 


On the inside of the folio, I created a pocket on the insides of the front and back cover. I fussy cut some of the tags from the collection and tucked them into the pockets. I also adhered some of the die cut flowers to the front of the slanted pocket. You could certainly slip in a note or letter  into the pocket. 


This is a sweet little quick project, and a great way to use all of the little labels and tags in the collection. I hope you are inspired to create your own folio, and get those flowers shaped!! 


Heartfelt Creations Products Used:

Clematis Die

3D Clematis Shaping Mold

Climbing Clematis Paper Collection

Rajni Chawlas Crystal Clear

Just For You Sentiments Cling Stamp Set


Be sure to comment on each of the blogs for a chance to be selected to win. You will be inspired along the way! 

Heartfelt Creations December 2021 Alumni Blog Hop List

·         Kathy Clement

·         Carole Wright

·         Vicki Dutcher

·         Candy Slabaugh

·         Alissa Wells

·         Amarilys Doria

·         Monica Edwards

·         YOU ARE HERE: Lisa Gregory

·         Heartfelt Creations

If You get Lost along the Way, 

❤ Click the link HERE to start.
❤ Be inspired by the project you see.
❤ Comment on the blog post you are on so you are entered for a chance to win.
❤ Click the link to go to the next blog for more inspiration.
❤ Comment on this blog post for another chance to win.

Repeat the process! The more blog posts you comment on the more chances you have to win!           


I


Monday, December 20, 2021

49 and Market December 20 2021

 Hello Lovelies. Well, this is my last DT project for the 2021 season. I wanted to do something to reflect the winter season. The Vintage Artistry Teal collection is perfect to create a beautiful icy wintery project. I added a lot of sparkle and kept it nearly mixed media free because I didn't want to take away from the gorgeous paper. The flowers in White Heron were a perfect addition to this layout. Living in Florida, we have lots of White Heron, and their snow white color is pure perfection! I am always amazed at the new collections that 40 and Market puts out. This one is no exception. The blues are gorgeous! I had a little happy accident, as reflected in the border sewing. I used the wrong side of the paper. It's ok, I love how this one turned out! Even though you see the underside of the sewing. I also used some of the Teal Rub-Ons around the edges as well. 


For the frame, I die cut it using a piece of the Teal 6x6 papers. It has a little bit of a marble effect. I mounted it on corrugated cardboard cut from the same die. I machine sewed around the inner border. I saved the middle cutout to mount the photo on as well. I topped it with Mod Podge in Matte to give it a bit of a sheen. 


The blooms in White heron are beautiful. I used a little bit of white gesso and some art stones for texture. I used the Bubbles and baubles randomly around the design, and also used them for the middles of the snowflakes. 


I die cut the snow flakes using a piece of Teal 6x6 paper. I used a piece with pattern on it, so each individual flake is different. I painted a very thin layer of Mod Podge on them, and sprinkled them with Crystal Clear. You could use any clear glitter for shimmer. The shimmering snowflakes are the perfect addition to my wintery layout. I tucked the snow flakes beneath all of the floral clusters. I also tucked in some Teal Rub-Ons. 


The laser cut butterflies are so sweet. I placed a few in a fluttering position. To finish off the whole layout, I used a watered down acrylic pain in a cream color to give it a hint of warmth, then used Nuvo Crystal Drops in simply white dotted around each cluster. I mixed art stones with glitter paste and randomly painted it around the layout. I did not want to take away from the beautiful pattern on the paper. 


Thank you for joining me today. I hope that you are inspired to use Vintage Artistry Teal to create some winter projects. 


49 and Market Products Used:

Vintage Artistry Teal 12x12 Collection Pack

Vintage Artistry Teal 6x6 Collection Pack

Vintage Artistry Teal and Mango Rub-On Transfers

Rustic Bouquet White Heron

Rustic Blooms White Heron

Wishing Bubbles and Baubles Teal


Sunday, December 5, 2021

49 and Market..."Autumn Days"

 Hello Lovelies. Today I bring you a layout created with the beautiful Vintage Artistry In The Leaves. The colors of Autumn are my favorite. The colors are warm and beautiful. You are simply going to fall in love with this collection. The 12x12 paper collection comes with 2 sheets of laser cuts. So if you don't like to fussy cut, 49 and Market has done it for you! And don't forget the add-ons to the collection as it gives you so many more design possibilities! 


I used 2 colors with 4 floral collections. Rustic Bouquet and Rustic Blooms in Marigold and Cranberry, They are the perfect colors for these papers. I did some fill ins using In The Leaves Foliage. If you hit the acetate briefly with a heat gun, the ends will curl a little, giving them some extra dimension. I really love the little "whirlygigs" (seeds from a Maple tree)  fluttering towards the bottom of the page. I only adhered them from the middles so as to appear that they are fluttering. I think I need more of them!! 


I used 1 sheet of 6x8 paper collection and cut it into thirds. I put some notches on the top corners and punched a hole to make them tags. I machine stitched around the perimeter of the tags, as well as the 12x12 background paper. I added corrugated cardboard to the backs and popped them off of the background. I die cut the photo mat from one of the Ephemera Bits and die cut the photo using a stitched rectangle die for both. I strung some jute through the holes. I clipped on the fall tab to one of the strings and added a tiny flower. The batten lace on the sides of the matted photo, is a laser cut form the 12x12 collection. 


There are so many beautiful pieces to coordinate with the In The Leaves collection. A few weeks ago, I was experimenting with die cut leaves I cut from a soda can, and applying alcohol ink to. They match this collection perfectly because I took the colors from the papers, and found them in my alcohol ink stash. I tucked a few of the leaves in this layout. I topped them with some butterflies and added more Rustic flowers and leaves to create the clusters. To finish the layout, I added some Wishing Bubbles and Baubles around the page, as well as some gold flakes, some dots of Nuvo Crystal Drops,  and spattered white  paint. 


Thank you for joining me today. Be sure to check back to the blog every day for more beautiful inspiration! 


49 and Market Products Used:

Vintage Artistry In the Leaves 12x12 Collection Pack

Vintage Artistry In The Leaves 6x8 Collection Pack

Vintage Artistry In the Leaves / Autumal

Vintage Artistry In The Leaves Foliage

Vintage Artistry In The Leaves Ephemera Bits

Wishing Bubbles and Baubles Mango

Rustic Blooms Cranberry

Rustic Blooms Marigold

Rustic Bouquet Marigold

Rustic Bouquet Cranberry


Friday, November 26, 2021

Heartfelt Creations Alumni Black Friday November 2021 Blog Hop


Good Morning, and welcome to the Heartfelt Creations Black Friday Alumni Blog Hop. I hope your Thanksgiving was fabulous! There is so much inspiration on the way, so you don't want to miss a thing!

Plus, Heartfelt Creations is having a fabulous Black Friday Sale!! Stock up on all of the goodies you have been wishing for all year long!! I know I am!! 

The hop begins today, and runs until 11:55PM EDT on Monday, November 29th, 2021. A randomly chosen comment from a mystery blog will be chosen to win a $25 Heartfelt Creations Gift Card. Heartfelt Creations is also giving away a second $25 gift card for a randomly chosen comment from their blog. The winners will be announced on the Heartfelt Creations blog and Facebook page on Wednesday, December 1, 2021. The winner has 72 hours to claim the prize by emailing socialmedia@heartfeltcreations.com. Please write “Winner of the November 2021 Alumni Hop” in the subject line. 

Today, I have created a holiday themed card using the Festive Poinsettia stamps and dies. I have also used the brand new, Simply Classic Oval Frame Die. With all of the different layers, you can create quick and easy cards in so many different designs! Wait until you see the different the different sets. You will want them all! I didn't use all of the pieces in the set, and I actually used the small oval die from the Royal Elegance Frame Die to cut out the sentiment. Dont be afraid to check your stash and mix and match. I used the Lux Gold Cardstock to die cut the Classic dies. Heartfelt Creations carries Silver as well. Perfect for your holiday projects. 

I went a little Heartfelt Creations old school on this card. I was looking through my Heartfelt Creations stash (which goes way back) looking for a sentiment for this card, as I didn't have one for holidays! May The Wonder Of The Season is from the Dove Of Peace Precut Set. It is of course retired, but for me will never go out of style! The flowers  and leaves were stamped in a very dark green ink. The flowers were colored with Fired Brick Distress ink, and the leaves were colored with Crushed Olive and Peeled Pain Distress Ink. I kissed the leaves with a little of the Fired Brick to blend in with the flowers. The yellow middles were colored with Mustard Seed Distress ink. Once all of the flowers and leaves were colored and assembled, I used Crystal Clear on them for sparkle. I just love the way it makes your flowers look! So festive for this holiday card. 

I had a lot of fun putting this card together. The gold in the frames, the blush of the red, and the sparkle of the flowers came together perfectly. My process is to get all of the flowers and leaves done. Then die cut all of your frames. I always make more than I need. Once they are done, everything else is easy to do. Just TUCK and LAYER!! Couldn't be easier! 


Thank you for joining us for this fabulous blog hop! Be sure to visit all of the artists, and leave them some love. You never know. You may be one of 2 chosen to win a Gift Card. 

Heartfelt Creations Products Used:

Large Festive Poinsettia Cling Stamp Set

Large Festive Poinsettia Die


Heartfelt Creations November 2021 Alumni Hop List

Kathy Clement- https://wp.me/p34lmI-664

Vicki Dutcher- https://allidoisstamp.blogspot.com/2021/11/heartfelt-creations-alumni-november-hop.html

Carole Wright- http://theprettypaperpatisserie.blogspot.com/2021/11/26th-november-black-friday-heartfelt.html

Monica Edwards- http://scraps2treasure.blogspot.com/2021/11/blackfriday-heartfelt-creations-hop.html

Oksana Clegg-  http://everydaycrafting.blogspot.com/2021/11/heartfelt-creations-november-blog-hop.html

Emily Niehaus- https://emmielouwho.blogspot.com/2021/11/heartfelt-creations-black-friday-blog.html?m=1

Candy Slabaugh- http://candyscreationsblog.blogspot.com/2021/11/heartfelt-creations-november-alumni.html

Lisa Gregory- https://what-a-beautiful-mess.blogspot.com/

Alissa Wells- http://willrunforstamps.blogspot.com/2021/11/candlelit-christmas-part-2-heartfelt.html

Amarilys Doria- https://amadrian8.blogspot.com/2021/11/fridayheartfelt-creations-november.html

Heartfelt Creations- http://hcgo.co/HeartfeltCreationsNov2021


Saturday, November 20, 2021

49 and Market Vintage Artistry Naturalist.

Hello Lovelies. We are heading toward the end of the year!! I can not believe it is almost December! So closing out November, I have created a woodsy, Autumn themed  12x12 layout, using the new Vintage Artistry Naturalist. And it is beautiful!! It has all of the flavor of Fall, and so much more. Greens, yellows and rich cranberry colors are simply delicious. The Naturalist Collection Pack has 2 cuts of laser sheet that are fantastic! For those who do not like to fussy cut, it is already done for you! Such a time saver. This pack goes a long way!! I only used 1 sheet for this layout, cutting out a square from the middle of the 12x12 paper, then reversing the middle piece, and mounted  it on corrugated cardboard, adding an additional piece of cardboard under it and then then finally attaching it to the background. This gives the entire layout some dimension even before adding the embellishments. I wet distressed all of the edges, and used distress ink. I added some twigs from my yard to frame the middle layer, and hot glued them to the layout. Then the fun began. Embellishments!!!!

I sorted through all of my flowers, and chose the ones that would compliment the color in the papers, and my photo. I love how the different flowers compliment each other in color. As if they were put together in the same pack. 


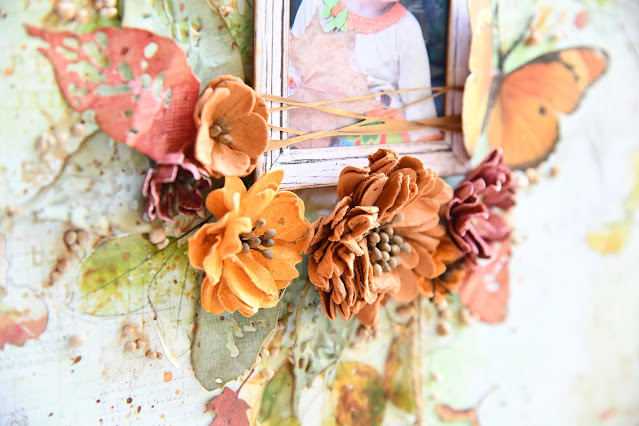
I love the new Vintage Artistry Naturalist Bookplates. I used one as the base for my framed photo. I used a File Frame and attached it to the laser cut window from the Naturalist 6x8 collection pack. I added my photo to the back, and fussy cut it along some of the arch on the window for visual interest. I tucked in some laser cut flowers on the inside of the frame, and one peeking out the top.  Tucked a couple of beautiful laser cut butterflies here and there. 


I love creating little clusters of florals on a layout. Just a little waterfall of flowers can make a big  impact in a design. Tuck in some leaves and call it done. 


Thank you for joining me today. I hope that you are inspired to create using Vintage Artistry Naturalist. You are going to love it! xo


49 and Market Products Used:

Friday, November 5, 2021

49 and Market November Blog Post/ November Sketch

Hello Lovelies. Today I bring you inspiration using one of the newest collections. Vintage Artistry Colors Mango!!! Such a sweet and sunny color, which I found perfect for my fall photos. It is another must have collection, with its beautiful patterns, and 2 sheets of laser cuts. If you add the matching Ephemera Stack, Bubbles and Baubles, Rub-Ons, and so many gorgeous flowers to choose from, there are endless possibilities to create! So many other 49 and Market collections would match Mango. I used the Vintage Artistry In The Leaves Foliage and it matched to perfection! I used the November Sketch for inspiration, by turning it clockwise once. This is the view I used. Like always, I elaborate. 


I love to add layers. The Mango Ephemera Stacks, and the Vintage Artistry File Frames stack beautifully. Even though the File Frames have the illusion of stitching on them, I still wanted to use a thread I had that matched perfectly. So I machine stitched them. I saved the cutaway strip from the bottom of the 12x12 paper, and cut the words out. I trimmed the word Happy and attached it to the tab on the file folder. I inked all of the edges with distress ink. I tucked in some In The Leaves foliage. 


I created a cluster using the In The Leaves Foliage, A laser cut butterfly, Sugar Posies in Tutti Frutti, and Wild Flowers in Ginger. I also Machine stitched around the perimeter of the background paper. 


I created a cascade of flowers, and tucked in some In The Leaves foliage and a laser cut butterfly.  For textural interest around the layout, I used Art Stones, Rhinestones, Bubbles and Baubles, Nuvo Crystal Drops and gold foil. The bow below the photo is one of the laser cuts in the Mango Collection pack. 


I die cut the frame using the leftover paper that I cut from the 12x12 paper. I layered 2 die cut pieces and backed them with corrugated paper for more dimension.  I added a beautiful lace Rub-On on the top of the frame, and the flowers to the left side are laser cut from the collection that I tucked in-between a File Frame and Mango Ephemera. 


Friday, October 29, 2021

Heartfelt Creations Alumni Blog Hop 2021


Welcome to the October Heartfelt Creations Alumni Blog Hop!! I hope that you are inspired to create your own projects using Heartfelt Creations gorgeous product. You also have a chance to win a $25 Gift Certificate to go shopping at the Heartfelt creations Online store!  Heartfelt Creations will also be giving away a second $25 Gift Certificate. The Hop begins 8AM EDT on Friday, October 29, 2021 and runs until 11:55PM EST on Monday, November 1, 2021. The rules are simple. Leave some love on each of the artists page in the Hop. A random comment will be chosen to win. The winners will be announced on the Heartfelt Creations blog and Facebook page on Wednesday, November 3, 2021. The winner has 72 hours to claim the prize by emailing socialmedia@heartfeltcreations.com. Please write “Winner of the October 2021 Alumni Hop” in the subject line. 


And here is the card I created for the Hop. My favorite season is fall. I decided to create a standard A9 card with Fall colors. I absolutely adore sunflowers, and the new Rustic Sunflower collection is beautiful!! I find that is easy to just create all of my flowers and leaves in one sitting. This way, I just pluck them up and put them on!! The base of my card had a beautiful green paper from the Clematis paper collection. I layered on the Elaborate Oval Frame in yellow and brown cardstock. I used the Sentiments Stamp Set for the title. Team mate Kathy Clement inspires me to use ribbon. I have a TON!! May as well use it!! So I topped my card with a bow. 


To create my double layer flowers, I stamped the flowers and leaves in a brown ink. For the flowers, I used 2 different colors of Distress ink. Spiced Marmalade and Dried Marigold with a little bit of Vintage photo on the middles. I used the HC shaping tools to give my flowers dimension. Then I layered the using 2 die cuts, staggering the petals. I then painted them with some collage medium, which is basically watered down glue, and sprinkled some Crystal Clear on them. I used some brown Flower Soft in the middle and on some of them, I sprinkled on some Express-O Yourself Prills. 


For the leaves, I used a brown ink to stamp them, then used 2 different Distress inks on them. Crushed Olive and Peeled Paint. I also touched them up a bit with Vintage Photo. I used Crystal Clear on them as well. 


Thank You for joining me on todays hop. I hope that you are inspired to whip up some Rustic Sunflowers!!! Until next month!! xo Happy Fall!!

❤ Click the link HERE to start.

Kathy Clement - https://wp.me/p34lmI-62H

Vicki Dutcher - https://allidoisstamp.blogspot.com/search/label/Heartfelt%20Creations

Carole Wright - https://theprettypaperpatisserie.blogspot.com/2021/10/29th-october-heartfelt-creations-alumni_0270561559.html

Alissa Wells - https://willrunforstamps.blogspot.com/2021/10/candlelit-christmas-part-1-heartfelt.html

Amarilys Doria -https://amadrian8.blogspot.com/2021/10/fridayheartfelt-creations-october.html

YOU ARE HERE: Lisa Gregory - https://what-a-beautiful-mess.blogspot.com/2021/10/heartfelt-creations-alumni-blog-hop-2021.html

Candy Slabaugh - https://candyscreationsblog.blogspot.com/2021/10/heartfelt-creations-october-alumni.html

Oksana Clegg - https://everydaycrafting.blogspot.com/2021/10/heartfelt-creations-october-blog-hop.html

Monica Edwards - http://scraps2treasure.blogspot.com/2021/10/heartfelt-creations-alumni-hop.html

Heartfelt Creations - http://hcgo.co/HeartfeltCreationsOct2021


Heartfelt Creations Products Used:

Climbing Clematis Paper Collection

Rustic Sunflower Die

Rustic Sunflower Cling Stamp Set

Leafy Accents Die

Leafy Accents Cling Stamp Set

3D Leafy Accents Shaping Mold

Rajni Chawlas Crystal Clear

Deluxe Flower Shaping Kit

Express-O Yourself Prills

Elaborate Ovals Frames Die

Just For You Sentiments Cling Stamp Set

Friday, October 22, 2021

49 and Market Vintage Artistry Teal Collection

Hello Beauties! I am here to hopefully inspire you to create a new project using the gorgeous Vintage Artistry Teal collection. I have created a 12x12 layout and paired the Teal with Vintage Artistry Mango. The colors complement each other beautifully. The 12x12 Collection Pack has 2 sheets full of beautiful laser cuts. Flowers, frames, leaves, butterflies, and a beautiful 10 window door that I used on this layout. There is so much beauty in the 12x12 paper I chose, (Bloom), that I did not use any mixed media on this layout. It is all flowers, laser cuts and Rub - Ons. And don't forget the little details that create a big impact. Like using acetate behind your frames or windows, and stringing some jute on to your laser cut tags. When you glue on the butterflies to your projects, only use glue on the body, so that you can lift the wings after it is dry. Remember the little things! 

I mixed 2 different flower collections on this layout. I love the sweet ferns in Maura's Vineyard, and the variety of Ginger flowers in the Country Blooms pack. I chose the laser cut word banners for my title, and tucked in some moss for a rustic garden look. 

The Rub-Ons glide on like butter! And the doily design, is one of my favorites that you will find in each of the rub on packs. Here I used the mango color. I also rubbed on, some seed beads and butterflies. For the 10 window panel, I backed the window with some clear acetate for a more realistic look, and I used one of the bubbles and baubles to create a knob. The word on the knob is joy...

I clustered some of the things I would find in the woods behind my back yard, where the photo of my granddaughter was taken. Fern, moss, flowers, tiny plants and butterflies. These are a few of her favorite things...I ties some single ply jute around the photo before I adhered it to the photo, then topped off the bow with a laser cut bow. 


Thank you for joining me today. I hope you are inspired to create your own beautiful project using Teal and Mango. The beauty of a lot of the Vintage Artistry line is that you can mix and match for endless possibilities! I wish I had some mushroom laser cuts from Hike More!! I would have used them too!! Look through your 49 and Market collections. You never know what you will find to mix and match!  


49 and Market Products Used:

Vintage Artistry Teal 12x12 Collection Pack

Vintage Artistry Teal - Bloom

Vintage Artistry Teal and Mango Rub-On Transfers 

Wishing Bubbles and Baubles-Teal

Vintage Artistry Teal Ephemera Stacks

Country Blooms Ginger

Maura's Vineyard Chardonnay

Jute Cording - Single Ply

Tuesday, October 5, 2021

49 and Market In The Leaves Collection. "Hello Fall"

 Hello beauties. I think no one loves fall more than me!! Living in subtropical weather, makes me miss fall the most!! That doesn't mean I can't scrap my favorite season! My cousin mailed me some leaves from New York, and I used them in a photo shoot of my granddaughter. One of the newest collections, "In The Leaves" is the perfect collection to scrap those gorgeous days of autumn. The colors, the textures, this amazing collection has it all. I was so in love with the September sketch, I had to use it for inspiration again. I did a little texture in the background with a stencil and texture paste, then used some distress ink around the edges of the 12x12 layout. and rubbed a bit over the textured parts of the background. I went over the entire background with clear gesso. When it was dry, I spritzed the background lightly with water, then used some Starburst Spray in a couple of different coordinating colors to wash the color into the background. This is for a watercolor effect that the paper already had. I just wanted to enhance it. Then I began building my design. The coordinated products to the papers are phenomenal! What I used is listed below. 


The newest colors of flowers are gorgeous! So rustic and beautiful at the same time. Deep yellows, brick reds, rusty golds, just beg to be used on an Autumn project. I mixed and matched Rustic Blooms, and  Rustic bouquet, in different colors. 


And don't throw out those small scraps. I saved some of the scrap Peace and Joy papers from my previous project. The colors were perfect for the leaves that I die cut to tuck in here and there. The laser cuts are awesome!!! You can see the falling leaves just fluttering down the layout.  Look at that little Maple Seed!!! I need MORE!!! And the In The Leaves Foliage are little bursts of big color scattered throughout as well. There are leaves, butterflies and leaf clusters in the pack. I layered the laser cuts, strung one of them with jute and hung it from the floral cluster. I also inked and tucked in some lace for more texture. When the layout was complete, I added some colored Art Stones, and spattered some ink on the page. 


The laser cut butterflies are beautiful! And I simply adore the laser cuts to top the photos which looks like they were wrapped in string. The new Essentials Whitewash Chipboard Frames are perfect to showcase your photos. I edged it in some distress ink, and topped it over a File Folder Frame which I also inked.


Thank you for joining me today! I hope that you are inspired to create your own Fall project. I can promise you this isn't the last project I will do with In The Leaves. Get yours soon!!


49 and Market Products Used: